In an ideal world, every corner of every plywood sheet would be perfectly square. Needless to say, I don’t live in an ideal world. While not every project calls for perfect angles, some do – and this guide will take you through how to square plywood on a table saw for them.
Contents
Why Use a Table Saw?
You may be wondering why you can’t bust out your circular saw and slice yourself some nice, straight edges. You certainly can, but if you’re going for high degrees of accuracy then you’ll want to use your table saw.
Table saws have one main advantage that a circular saw doesn’t – the fence. The fence is a guide bar, usually metal, that runs parallel to the saw blade.

It can be adjusted towards or away from the blade, but it stays at a 90-degree angle to give a precise guide for straight cuts.
Overall, when you need a perfectly square board, you’re going to be hard-pressed to get as accurate cutting angles with a circular saw.
How to Tell if Your Plywood is Square
The first step for how to square plywood on a table saw goes back to geometry.
Plywood sheets are (theoretically) rectangles, and every corner should be 90 degrees. When the boards aren’t square, however, they can take on other shapes. When one set of diagonal angles are less than 90 degrees and the others are more, this creates a rhombus.
When adjacent angles are less than 90 degrees and the others are more, this creates a trapezoid. The board can either form a long or a wide trapezoid depending on how the angles are affected, and two of the corners can even be square with the others messed up. So how do you tell?
Use a Speed Square
In order to determine how square or not your plywood board is, you’re going to need a speed square. Unlike the name implies these are not actually squares, but rather a 30-60-90 right triangle.
To measure whether your plywood is square, hook the lip of the speed square against the edge of the board and move the perpendicular side toward the corner.
If the edge of the plywood lines up with the edge of the speed square, then congratulations! You have a square corner. If it doesn’t, don’t worry – you can readily fix it.
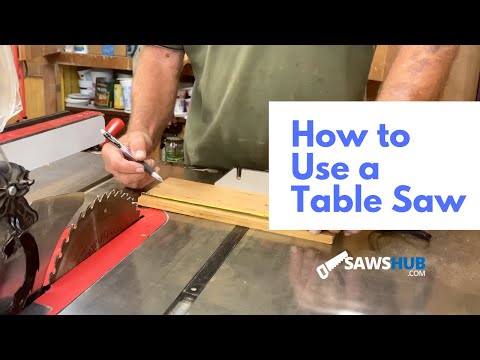
How to Square Plywood on a Table Saw
Once you’ve determined which angles on your plywood need squaring, these are the steps you’ll want to follow to make those 90 degree corners.

Step 1: Draw Out the Cut Lines
You already know your speed square has a 90-degree angle built-in, and now it’s time to put it to use again. Let’s say that none of your angles are square. Go to one of the corners that’s wider than 90 degrees and use the speed square to measure a right angle.
Draw your cut line by following the 90 degrees – along the short side of the board so that you waste less material. Make sure you use a straight edge as your guide for the cut line beyond the speed square and make sure you draw the line from the corner of the wide-angle.
Then you’re going to do the same thing with the other angle that’s wider than 90 degrees, and you should have two thin triangles that’ll be your scrap pieces.
Step 2: Make a Guide or Use the Miter Gauge
The main part of the table saw that’s going to give you an accurate cut, the fence, is the one thing you can’t rely on when you don’t have perpendicular edges.
If you put the edge of the plywood against the fence, your cut line won’t line up and you won’t be able to cut the angle you need off the other side. You can’t use the fence with your plywood – but that doesn’t mean you can’t use it with another piece of wood. That’s where a guide comes in.
Line up your plywood sheet so that the saw is going down your cut line. The edge of your board won’t be parallel to your fence, but that’s ok. Now take a 1×6 board and lay it over top of your plywood, orienting it so that the edge of the 1×6 is parallel to the fence and butts up to it.
Screw down the board to your plywood, and you now have a straight edge guide to ride along the table saw fence as you make the cut.
The other option is to use a good table saw miter gauge. Because plywood sheets are big, you’re probably going to need to screw on an extension piece to your gauge’s fence, and a 2×4 will work just fine.

You can also make a permanent, adjustable extension fence. Make sure your miter gauge is set to 0 degrees, and then press your plywood against the fence.
Since you drew the 90 degree angle off the edge of your plywood, this edge will work for the fence.
Step 3: Make the Cuts
Don your safety equipment and fire up the table saw, letting it come up to speed. No matter which one you use for your guide, the miter gauge, or the fence, make sure that you are only using one or the other.
If you use the miter gauge and have the corner pressed against the fence, the piece you cut has the potential to get wedged between the blade and the fence.
This is the perfect condition for kickback, and the last thing you want is that piece getting launched back at you at 80+ miles per hour. The other thing you want to make sure of is that your plywood is supported as it moves to the back side of the saw, so that it isn’t bending as it gets cut.
Once your table saw is up to speed, make sure you maintain strong contact between the saw and whichever fence you use as you feed it through. This will ensure the accuracy of your cut, and leave you with a square corner after.
Once you square the first corner, you can remove the guide and use the edge you just cut against the fence for the second cut. After that cut is finished, you should be left with a square board.
Final Thoughts
In conclusion, you’re going to need a speed square to measure your plywood’s angles and draw out 90 degree corners.
Then you’ll need to use either the rip fence or the miter gauge to guide the cut. And that’s how to square plywood on a table saw.