As an Amazon Associate we earn from qualifying purchases.
Pallet wood has become a go-to source for creating an interesting décor piece in your home that is both affordable and contemporary. The rustic, shabby chic look is very popular today, and pallets have because of a very trendy way to infuse this style into your house.
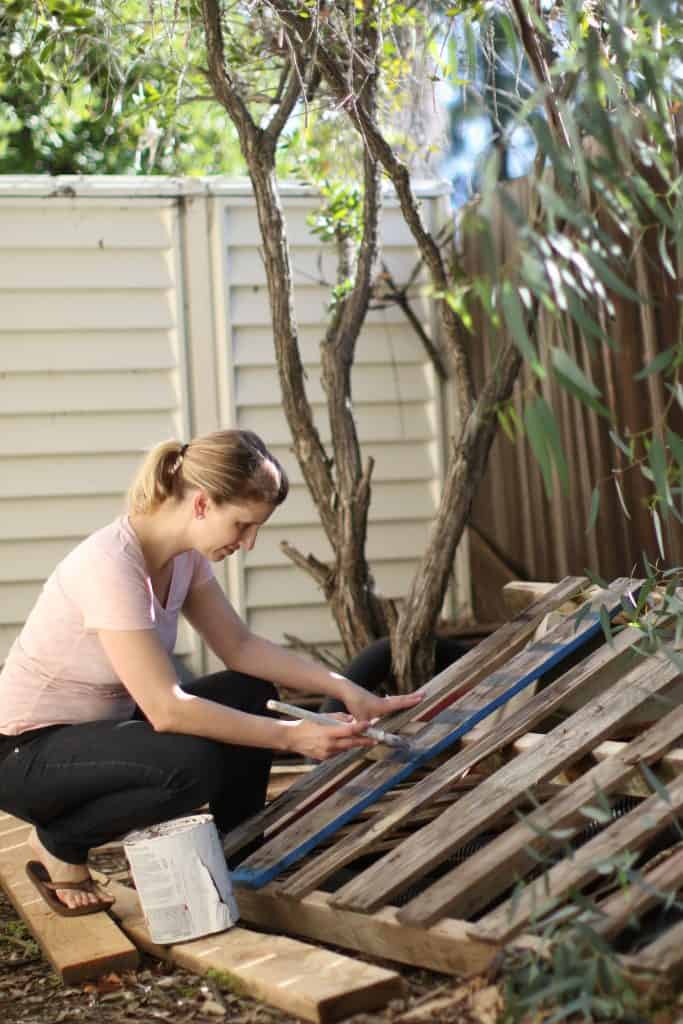
I’ll walk you through how to paint pallets and how to stain pallet wood, so that you have the perfect finish for your DIY project.
Preparing Wood Pallets for Finishing
Crafting wood pallets in a usable piece takes some ingenuity and design expertise, but the process of painting and staining can be done by virtually anyone.
Make sure you’ve already constructed your pallet project, including making all of the cuts that are needed, along with putting everything together in its finished form. Painting or staining should be done as the final step.
I’m going to assume that you have already built your piece, and are now determining how to add the finish to it.

Deciding Between Painting or Staining
Before you can get started finishing your wood pallet piece, you need to determine if you want to paint the wood or stain it.
Both painting and/or staining provide a valuable and essential protective layer over the wood. Without either, the wood would weather and deteriorate quickly. If your pallet piece is being used outdoors such as deck flooring, this could happen in less than a year.
Even indoors, with paint or finish, the wood is susceptible to many things that will shorten its lifespan.

Selecting Paint
With paint, you have the ability to select virtually any color you want. The paint will go on the pallets and take on the color you choose. This allows you to match the pallet furniture piece to any room of your house, adding a color balance to harmonize in the room.
Paint will also completely cover the pallet wood, hiding most all of its imperfections. Given the nature of this type of weathered wood, and how it is usually pretty damaged, this might be something that is really attractive to you.
Painting isn’t difficult either, so if you’re a bit afraid of the staining process, you might want to start with a paint.
Selecting Stain
Stain, on the other hand, will allow some or all of the wood grain and appearance to show through. There are many different types of stains, ranging from a clear varnish all the way up to a colored stain.
- When using a varnish stain, you are not altering the color or texture of the wood. The varnish is only providing a protective coat on the piece.
- A colored stain will darken the wood and add color to it. You can select from a variety of colors, and then control the amount of color through how many applications you give.
Either way, you can’t go wrong with either, because you are adding a significant amount of protection to your pallet furniture piece.
Selecting Similar Pallet Wood
Before you begin the actual process of how to paint pallet wood or stain it for that matter, you need to understand a few things about the paint or stain that you are using as well wood surface they will be applied to.
Pallets are not a consistent type of wood. It can be made of pine, oak, timber or even mahogany. This can affect the look of your finished product, no matter what you’re using. To get the most seamless looking surface on your wood, it is a good idea to use the same wood across the board for your project to avoid variances in color.
Gather Your Supplies
The very basics of painting pallets or stain them starts with the rights supplies. There are some basic supplies you’ll need, many of which you might already have in your house or garage. I’ve provided them here to help you ready for your pallet wood project.
- Soap
- Water
- Clean cloth
- Primer (optional)
- Stain or paint
- Paintbrushes
- Sandpaper
- Clear acrylic coat
- Wooden pallets
Wash Your Pallet
Now I am finally ready to begin preparing your pallet wood. It is always a good idea to clean the surface of the glue and dirt that have built up on it. This will provide you a clean surface to work with.
Simply use soapy water with a cloth to rub the surface of your wood clean. Be careful not to saturate the wood unnecessarily. You are not looking for perfection here, just a surface that will adhere paint or stain well.

Sand Your Pallet
You also might want to do a little sanding of your pallets to prep it for the paint or stain application. Pallet wood comes rough, and perhaps that is the way you want it. However, for certain types of projects, you need a smoother finish to the wood, and that is where sanding comes in.
- Start with high grit sandpaper and remove any splinters or snags that appear in the wood.
- Gradually move to low grit sandpaper for a smoother finish.
- Don’t worry about sanding too much… these are pallets I’m talking about here!
You will want to keep in mind that more rustic looking wood will not have to be sanded quite as much as projects that require a smoother finish to them. You don’t have to be overly concerned about nail marks or cuts in the wood as this just adds to the charm of the piece.
Filling Cracks and Gaps
For some, this is a step worth skipping. The entire reason you are working with wooden pallets in the first place is because you like the imperfections that it brings.
However, for others, you might want to spend a little bit of time filling in large holes, cracks, or gaps that the pallet comes with.
It helps to think in terms of function for this step. For example, if you’re making a table out of pallet wood, then you might want to fill in some of the large holes, so that your food doesn’t fall through or your drinks don’t tip over.
If you’re going to be painting, you can use any type of wood filler. If, on the other hand, you’ll be staining, opt for a high quality stainable wood filler.
How to Paint Pallets
Acrylic or latex paint will work well on pallets and give you a range of options to select from for your project. Avoid oil-based paints, as they are more than likely overkill for a project like this.
Painting Basics
You may also want to use a primer paint first for some paint colors. Primer will not only help you achieve a more consistent look, but it will also reduce the amount of paint you need.
For a more rustic look with your pallet wood, you will only want to apply one light coat of paint and not be overly concerned about getting full coverage with the paint. This will add to the character of the piece as the blemishes will show through and give you that rustic look.
Priming
Again, this is an optional step. If you truly want to cover your pallet thoroughly in paint, then you’ll want to cover your pallet in primer.
- If you’re adding primer, apply one coat thoroughly.
- You don’t need to worry about having an even look, but make sure you have thoroughly covered all of the wood with primer.
- Allow the primer to dry all the way before moving on to paint.
Some paints come with a built-in primer, and I find this is not the best paint for pallet wood. While it is an extra step, stick to straight primer for this project.
Keep in mind that primer is not required. If you want a more rustic, weathered look, skip the primer.

Painting
Apply the paint in a consistent, even manner. Keep a wet edge by overlapping as you paint. Avoid and drips or runs, and make sure not to apply too much paint in one sitting. To apply an even coat, I recommend using an interior paint sprayer. You can find the best option for spraying paint from my buying guide.
Wooden pallets are a cheaper wood, and so it can really soak up the paint. With that being said, if you opted to add primer, one coat of paint might be enough. Wait until the paint has thoroughly dried before making your final decision.
If your DIY project is going to be used outdoors, I recommend adding a second paint coat, simply for added protection against the elements.
Additional Touches
Sometimes, your pallet furniture piece will feel too slick and painted when you’re done. If you want to reduce this look and feel, use a very fine sandpaper and lightly run it over the piece.
If you want to add a more rustic look, try sanding the paint with a heavier sandpaper. This will “scuff” up the paint in areas, and allow some of the wood grain properties to show back through. Be careful, though, as over-sanding can ruin the project.
Other than that, if the pallet wood you’re using is for an occassional holiday decor piece, then considering to carve a scroll saw pattern for the holidays might be a good idea.
How to Stain Pallet Wood
Stain is a completely different type of application for your wood pallet than paint. You’ll need to select what type of stain you want, and then apply according to the instructions.
Staining Basics
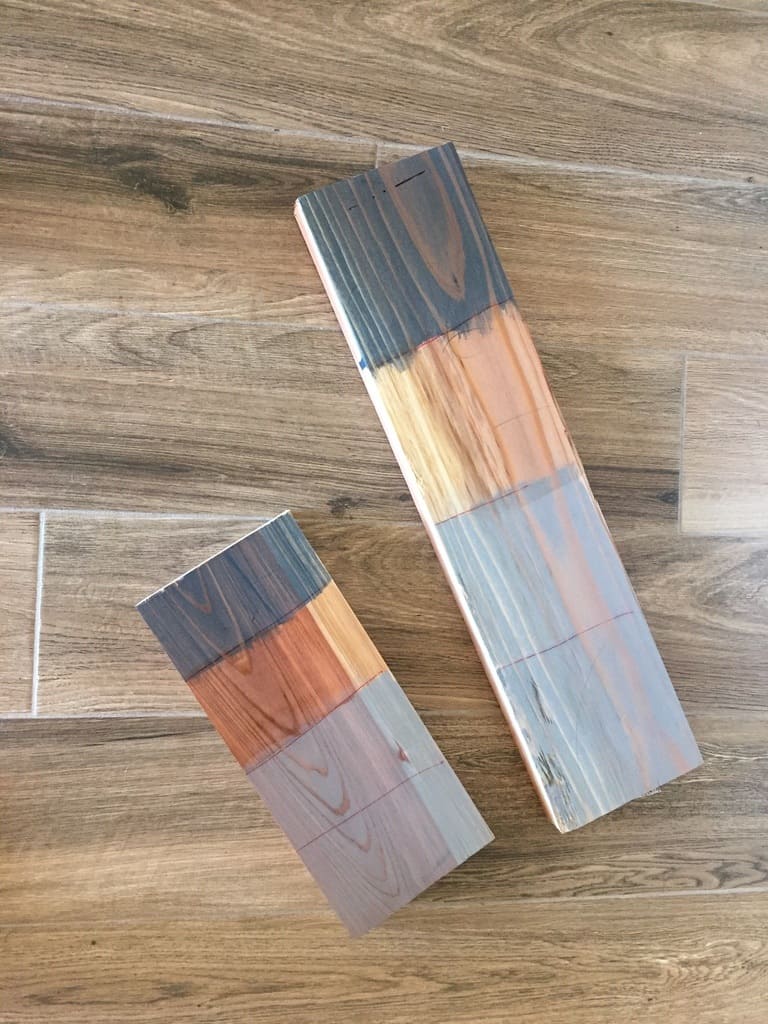
It is important to keep in mind that the stain color that you select will actually appear darker on the surface of your pallet wood than it appears on the package. For this reason, you will want to test the stain on an area of the wood that will not be visible or a scrap piece to ensure it is the color you are looking for.
You also need to make sure that you select a stain that is compatible with pallets. It should be able to be used with wood preservatives as well as sealants and a top finishing coat.
You can use a water-based or an oil-based stain on wooden pallets and select how deep of penetration you want with the stain. Deeper penetrating stains will give you more lasting coverage and are good for outdoor displays of your pallet wood.
You can also play with how thick you want your stain to go on. You can use it as is, or thin the stain a bit to make it go on lighter.
Staining and Clear Coating
When working with stain, you can use a paintbrush or a cloth. Either application allows for good coverage, and in some instances, a cloth is easier to work with.
Practice on a spare piece of pallet wood and see which method works better. There truly isn’t a better method, as each one works differently with the specific wood and stain that you’re using.
Apply a thin layer of stain to your pallet wood in even strokes. You want to take care to cover the wood without over saturating any areas too much, as this will produce dark spots.

Don’t let the stain dry as you work. That isn’t to say you have to work rapidly, but don’t take too much time. Stain all of the surfaces of your project in one sitting.
Apply multiple coats of stain to the wood as necessary to get the darkness you are looking for. Wait until each stain coat has dried before you apply another.

Adding a Clear Coat Varnish
When completed, you will also want to add a clear finishing coat to lock in the stain and to provide additional protection to the pallet wood. A polycrylic or polyurethane will work fine, and you can find one that specifically works well with pallets and the stain you used.
This will also give it a glossy finish that has some luster to it. Apply the finishing coat with a paintbrush in an even thin layer. You can always add another coat to the wood if it needs it.
You can add up to 5-6 coats of the clear finish if you’d like. Each coat will add additional protection, while barely effecting the color of the stain.
Finally, lightly run over the finished product with a very light sandpaper. This will remove any bubbles or imperfections that developed in the staining and finishing process.
Conclusion
You have now completed painting or staining your pallet wood project. By learning how to paint pallets or stain them, you can easily create those stylish looks you see in popular home décor layouts. You can go for a rustic piece or reign it in for a more contemporary style. No matter what type of look you are looking to achieve with your wooden pallets, these easy-to-follow instructions will help you produce a finished product you are proud of.

