As an Amazon Associate we earn from qualifying purchases.
The project was to build a DIY dining room table. I had just moved to a new home, and so I didn’t have any money to buy furniture. With this newer, larger home, I had a huge dining space, and my dining room table was tiny.
Not only did the old dining room table look out of place and too small, but I wanted something larger so I could host a big group of people. That was the reason I moved into a larger house in the first place.
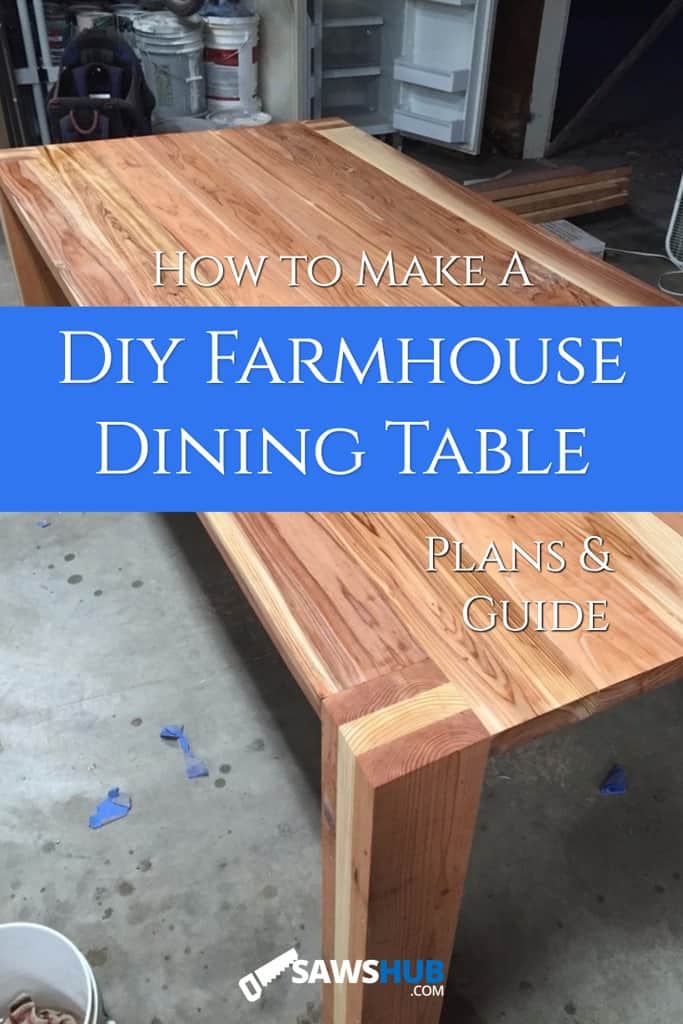
I had never built a table, though, and so I set out to determine how to build a dining room table. Luckily, there are a lot of options when it comes to DIY rustic farmhouse dining room table designs and ideas.
Here is the process for how to build a wood table to use in your dining room.
Contents
- How to Build a Wood Table
- Design Plans for My Wood Dining Table
- Supplies for the Farmhouse Dining Table
- Planing the Wood for the Farmhouse Table
- Building the Farmhouse Table Legs
- Building the Farmhouse Table Aprons
- Building the Farmhouse Table Top
- Sanding the DIY Farmhouse Table
- Staining my Farmhouse Table
- Finishing the Farmhouse Dining Room Table
- Adding Benches to the Farmhouse Table
- The DIY Wood Table Finished Product
How to Build a Wood Table
Before getting started on building the table, I had to determine what type of dining room table I wanted to build. From the beginning, I knew I didn’t want to build a table out of pallet wood. Not that there is anything wrong with a pallet wood table, it just wasn’t what I knew my dining room needed.
As I looked through different types of tables online, I kept finding myself gravitating towards a farmhouse table. After a visit to Crate and Barrel, I made the decision to move forward with building a dining room table.
The design I picked is the type of woodworking project you can sell down the road.
Design Plans for My Wood Dining Table
Let me start by saying that I wasn’t very experienced as a home woodworker when I did this project. I had a decent number of tools in my garage, most of which my dad has passed on to me over the years as he has upgraded. I’ve gotten a lot better and more experienced since building this table, but I was a novice at the time.
In the end, I selected a modern farmhouse dining room table design from Shanty2Chic. Their open concept rustic kitchen table design had been featured on HGTV. The plans looked simple but sturdy, and the design seemed to match the farmhouse table I saw at Crate and Barrel.
Supplies for the Farmhouse Dining Table
One of the great things about building a farmhouse table is that you don’t have to use expensive wood for the project. Frankly speaking, you can head over to Home Depot with your supply list if you want, and pick up some of their 2”x8’s.
That’s not to say that you can’t use nicer wood. In the end, though, I opted for a decent wood, but one that I could get from Home Depot. I went with redwood.
Redwood has a rich shading to it and is a wonderful option for furniture. It has a natural look to it, and can typically be found at your local hardware store.
When picking wood for your woodworking project, spend the time to select one that has the characteristics you want. You can’t go back and change it after you’re done…
At the Store
The plans called for (8) 2”x6”x8’ wood planks. I probably went through 40-50 of them while at the store. The reason is that I wanted to find the straightest wood planks that they had.
- To measure how straight it is, pick a board up and put your eye at the very end of the plank.
- Look straight down the plank, from one end to the other, and see if there is a bend or turn in the wood.
- Buying a piece of wood that has a bend in it will cause you a lot of problems when you’re building.
- This will result in your tabletop having big gaps in the seams, not to mention the difficulties you’ll have during construction.
I also ended up buying more than twice the 2”x6”x8’ planks that I needed. The reason is that the wood hasn’t finished completely drying yet. With it still, a bit damp, some of the wood will bend and buckle while continuing to dry.
In the Garage
As I mentioned before, you don’t want to work with wood that is bent. And, if you start building with wood that hasn’t dried yet, then it might bend and curve after you’ve finished the table.
With my (20) 2”x8’s, I went home and laid them out to dry in my garage. I ended up giving the boards around a month to dry.

After a month, each of the boards had dried out, and some had developed a curve or bend to them. These boards got returned, leaving me with the best eight boards of the bunch for my farmhouse dining table.
Not all of your DIY projects need this much attention and focus on the wood. In this case, because I wanted this table to last, I put in the extra work.
Planing the Wood for the Farmhouse Table
Before starting on this DIY project, I planed each of the 2”x8’ pieces of wood. I wanted to plane the wood for several reasons:
- Planing reduces the wood’s thickness a little bit. This wasn’t very important to me for this project, but I did slightly prefer a thinner tabletop.
- Planing creates a smooth surface on the wood, similar to sanding. However, planning is easier and faster than sanding (in my opinion).
During the planning, I also rounded the edges of two of the pieces of wood. The rounded edges would be the two end pieces of the table. The rounded edges give the table a more refined look and feel.
These rounded edges also make for a softer edge, which was going to be key for me with children.


Building the Farmhouse Table Legs
Ok, it’s the “build a dinning room table” day! At this point, I had spent months planning and purchasing the supplies, and letting them age and dry out. You’ll need some basic woodworking tools for this project. And, you’ll want a table saw! An entry-level table saw will probably do you just fine, although pay attention to a mistake I made with mine.
Ripping the Legs
I started by grabbing the 2×3’s and ripping ¼” off of either side. The goal is to bring the width down to 2”. Use a good table saw to rip the wood – it is the most accurate saw for ripping.
I then went and did the same thing with the 2×6’s for the table top, ripping them from 5 ½” down to 5” wide.
One note from my experience: keep checking your table saw fence. I was working on an older table saw (I have since gotten a newer, better table saw) and the settings would slip a little as I continued cutting.
As they say… measure twice and cut once. Luckily I had bought extra wood for the couple of mistakes that I made.

Note: If you’re a beginner, this piece of advice will help you: 2×3’s are not actually 3” wide – they are 2 ½” wide. The same can be said for a 2×6… they aren’t 6” wide, but only 5 ½” wide.
This isn’t by accident. Lumber manufacturers cut the tree to the listed size. But, while the lumber is drying, it shrinks down to the smaller sizes and then planed to the size that I have come to know.
Glueing the Legs
Once the 2×3’s were ripped, I cut them down to the 30” height that I needed, and glued three of them together. Using wood glue, pocket screws, and a few quick-use clamps, the three 2×3’s would dry, and come to make the legs.

Glueing the table legs together
It didn’t take more than an hour or two for the legs to dry. While they were drying, I moved on to building the table aprons.
Building the Farmhouse Table Aprons
A table apron is the wooden panel base that connects the table legs to the table surface. In other words, it is the under-girding that you use to support and attach the tabletop to.
- Using pocket screws, I attached the table aprons to the legs, starting with the shorter distances first. This is definitely a case of measure twice, cut once (or, in this case, attach once).
- You need to make sure that you have the distance from the top of the table leg to the top of the table apron correct. It needs to be exactly 1 ½”; otherwise your tabletop will not lay flush.

In addition, you have to make sure that all the pocket screw holes face inward.
Finally, I attached the cross braces. These braces are exactly 33 ½” long, and it is vital that they are all the exact same length.
- You’ll space these braces 14” apart, except for the two that are at the edges (14 ¾” from the edge). Once again, this is where a table saw comes into play, as you can achieve this level of accuracy with one.
- In addition to using pocket screws, I also used wood glue at every spot. The wood glue helps to provide additional stability beyond the pocket screws. For the minimal amount of extra time and energy, it is well worth your effort.
Building the Farmhouse Table Top
If you’ve ever done tile work, you know to start in the middle of the room and work your way out towards the edges. This way, you create continuity and an even pattern in the middle, where the focus of the eye goes. At the edges, where things might not end up perfectly even, the eye doesn’t notice.
The same can be said when you are building a dining room table. You should start assembling the tabletop from the inside 2×6’s and work your way towards the edge.
Assemble From the Inside Out
I had already used my table saw earlier to cut the top planks down to 84” long. I made the mistake of starting on the outside of the table, working my way in. Thankfully, I caught myself before glueing and screwing the tabletop in. See the image below for how NOT to do it!
I started over, starting in the middle of the table this time, adding the tabletop plans one at a time, using wood glue to hold them in place. Once the wood glue had dried (I didn’t wait that long), I used 2” brad nails from underneath to fasten the tabletop and secure it to the table apron.
The instructions devote only one line to installing the remaining 84” tabletop planks. However, I found that it was very time-consuming to do each plank.
The final two tabletop pieces fit inside the table legs, and so they are shorter. They need to be cut down to 74”. However, again, measure the actual distance you need prior to cutting.
In the end, my final two tabletop planks were cut to 74”, which was perfect. However, I could see that measurement changing by 1/8” or so due to the way the table had been assembled.

Add Pocket Screws
The final step was to go back around and use the remaining pocket screws to attach the tabletop to the table apron. In my opinion, brad nails and glue weren’t enough to keep this table together over time. The instructions recommend using screws as well, and I agree.
Ok, there you have it. If you’ve been wondering how to make a dining room table, now you know. At this point, I had a complete farmhouse dining room table. I was pleasantly surprised by just how solid it was. Lean on it and it was clear it wasn’t going anywhere.
The instructions imply that the table should only take a few hours to build. And, for an experienced DIY woodworker, I’m sure that might be true. However, for someone like me, it ended up taking the majority of the day. I was going slow and being careful, but it wasn’t a particularly quick process for me.
In the end, I couldn’t be happier with the results. Now, on to finishing the table! But, one more tiny thing first…
Check for Holes
Whether you started with a piece of wood that had a hole in it, or one developed during the cutting and building, now is the time to investigate your table for any of these. Holes can be a problem for a table, as food and other items can fall through to the ground.
Again – depending on how rustic you are trying to go on this project, you might prefer a hole or two. But, if you want to fill that hole, here is out to do so.
If the hole is tiny, you can just slap a good stainable wood filler on it and let it dry. Done.
If the hole is a little bigger, you might need to work several layers into it, letting it dry each time before adding more.
If the hole is large, try mixing some of the wood filler with sawdust to create a stickier paste, and apply that. This will fill a larger hole and still dry very hard.

Sanding the DIY Farmhouse Table
Because I had planed all of the tabletop wood ahead of time, I had a head start on sanding. I personally really dislike sanding, so this was a big bonus.
Some prefer more of a rough finish for their dining room table. The rough finish is easier because it requires less sanding, and carries more of a rustic look. This rough finish is really common amongst the pallet dining room tables that you see.
I wanted a really smooth finish to my table, which I knew would require several different sanding rounds, each with a different sandpaper finish. Here is the order of sanding I ended up following.
If you’re interested in learning how to build a pallet bed from scratch, check out my article here.
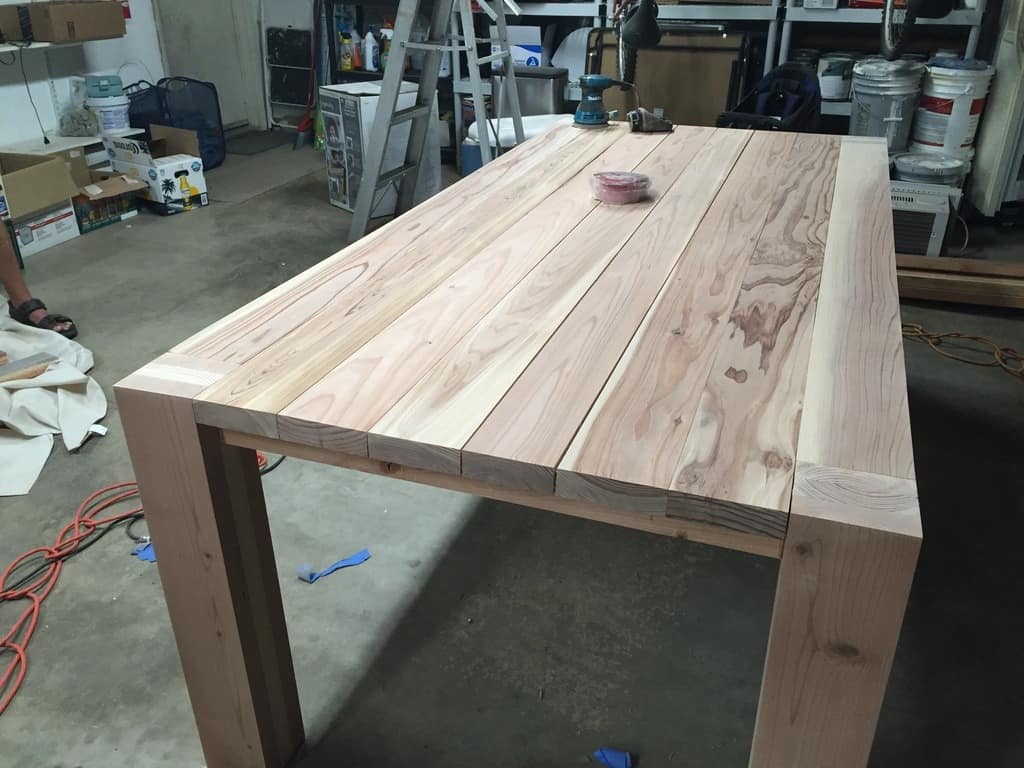
Sanding Steps
- 80 Grit Sandpaper with a Belt Sander: You have to be very careful using the belt sander because it has a lot of potentials to take off way too much wood. I used this very carefully, and hardly sanded much with the belt sander.
- 120 Grit Sandpaper with a Random Orbital Sander: This 120 grit takes all of the rough patches off of the tabletop.
- 150 Grit Sandpaper with a Random Orbital Sander: The 150 grit goes a little finer than the 120 grit. Once complete with the 150 grit, your tabletop should feel smooth to the touch.
- 220 Grit Sandpaper with a Random Orbital Sander: This grit will seem useless because it won’t feel any smoother to the touch after you’re done than it did after the 150 grit. However, this step is key if you’re going to apply a polycrylic finish to the table.
Once finished, the farmhouse table is ready for staining and finishing.


Staining my Farmhouse Table
One challenge that came with using redwood for the farmhouse kitchen table was that it responds differently to the wood stains. The redwood has a natural reddish hue (obviously) and thus mixes with a different color stain in a unique way.
Knowing this, I picked up several different types of stain to test, prior to picking my final choice. Keep in mind you don’t have to stain the table – you can move straight on to finish it.
Stain Color
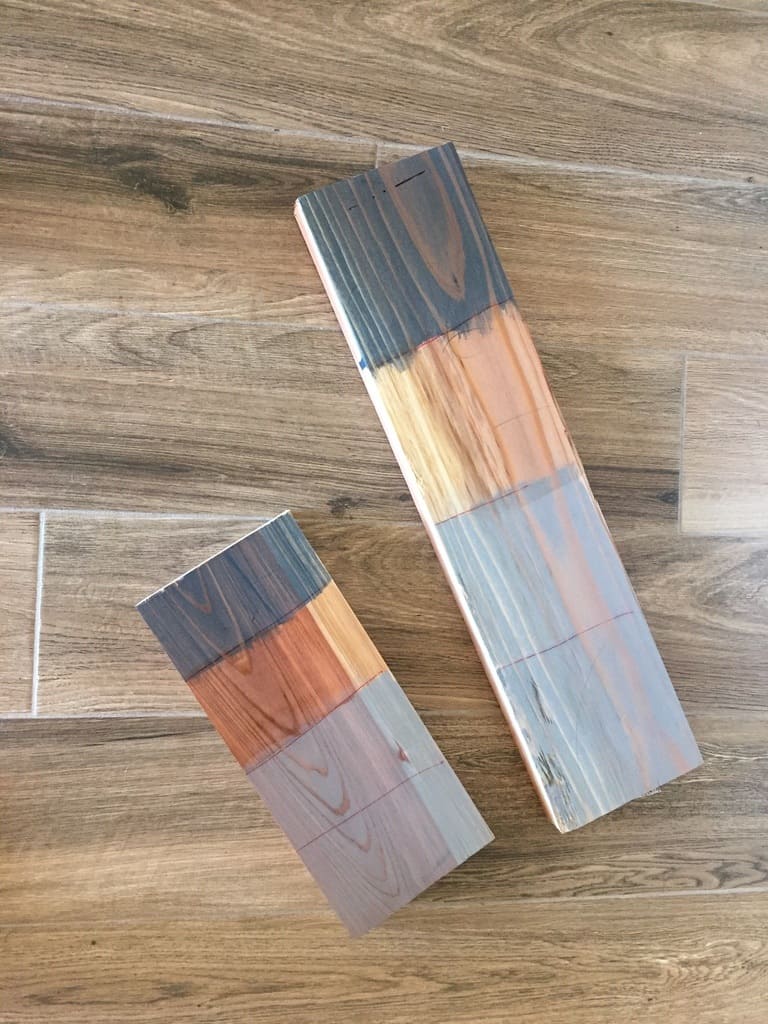
Based on a lot of research online, I opted for the Minwax wood stain. The two stain colors that it ended up coming down to for my rustic farmhouse table were Charcoal Grey and Pearl Grey. You can see on the sample logs that I tested that the Charcoal is the top color and the Pearl is the bottom color.
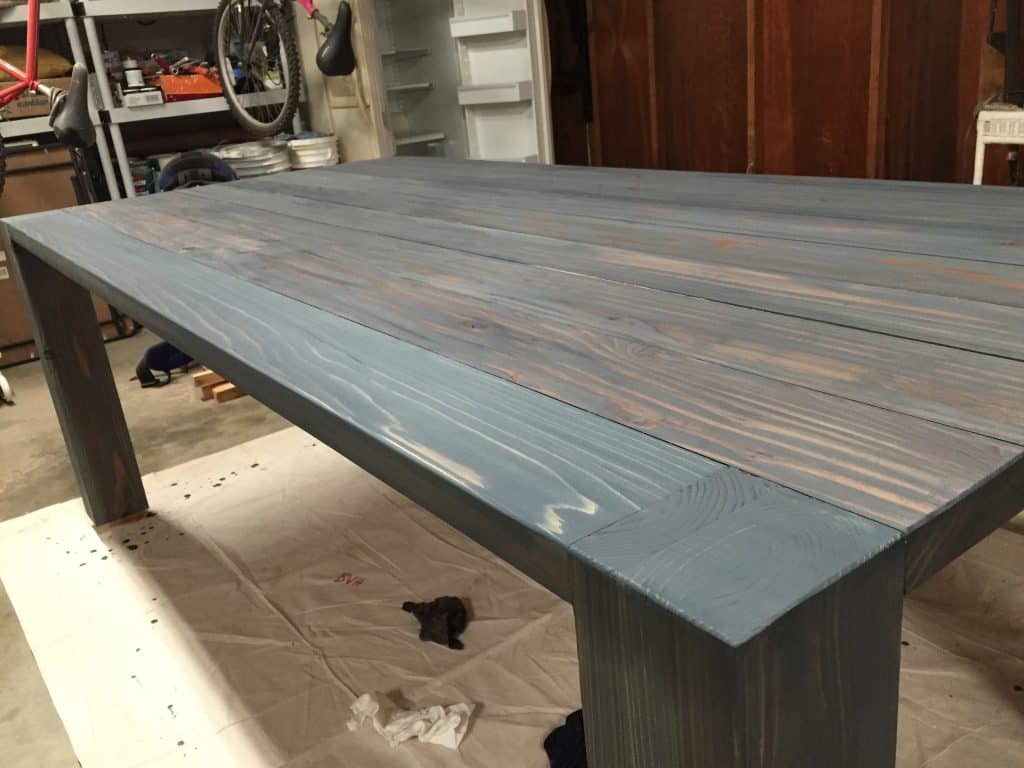
Ironically, the stain didn’t come out grey at all. When applied to redwood, the stain ended up having a blue-ish tone to it. However, unexpectedly, my wife and I loved the look of the Charcoal Grey stain color on top of the redwood.
In the end, I think I would have been happy with either of them, but the Charcoal worked out great.
Applying the Stain
To apply the stain, I used standard wiping clothes. You can pick up a large pack of these at Home Depot. I found it vital to be focused while applying the stain, and you really have to set aside a decent block of time to stain.
You can also thin out your stain if you think that it’s too thick and won’t go on very well.
You don’t want to only stain part of a board, and then come back and pick it up later. The reason is that it will dry at different times, and it will be quite obvious. One way to do the staining in pieces is to do one tabletop plank at a time. As long as you do the entire plank, then you won’t be able to see any differences.
I applied two coats of stain. After two coats, I felt like there was still plenty of deep, rich color in the wood from the stain, but I could still see the grain details coming through. I worried that another coat might completely block the grain, and that was one of the reasons that I chose redwood in the first place!
I elected not to stain the underside of the table – I saw no need to. It seemed like extra work and cost to me.
Finishing the Farmhouse Dining Room Table
I elected to use a water-based Polycrylic clear satin finish by Minwax. However, there are a variety of wood finishes that would have worked.
While you could lacquer a table top, my preference is to reserve lacquer for furniture you don’t eat off of.
This part is more annoying than it is complicated. At this point, I wanted badly to be done with the farmhouse table, and this was the final step. However, it’s important not to rush through it.


Don’t Let Bubbles Form
When you are applying polycrylic, it’s really important not to let any bubbles form. These bubbles will dry and become a permanent part of your table. If you start seeing bubbles, slow down as you are applying the finish. To get rid of the bubbles, just run back across them with your brush or wipe.
Let the polycrylic dry thoroughly in-between applications. This could take anywhere from a few hours to a few days, depending on where you’re doing the work.
Also, make sure you are controlling the environment where you are applying the finish and letting it dry. For me, I was doing this in my garage, and I had to be sure not to do any other sawing or sanding during finishing.
The reason is that any dust or debris that gets into the air can and will settle on the finish while it is drying. And, once dry, that dust is now a part of your tabletop.
After each application of the finish, I went back over it with 220 grit sandpaper to take off the imperfections.
How many coats of poly finish?
How many coats of finish do you need? This is widely debated, but I opted for more coats. Every coat of finish, while having diminishing returns, helps to protect the table from damage. It also helps the table last for a longer time.
For any woodworking projects that will end up outside, you definitely want to opt for more coats. The sun and elements wear away at everything, even the stone used on your fire pit, patio, and hardscape.
The downside of lots of coats of finish is that the table picks up a shine, and can feel a little “sticky” to the touch.
In the end, I put six coats of finish on the rustic farmhouse table. I probably could have stopped at 3-4, but I figured a few more couldn’t hurt.
Unlike the stain, I did apply a few coats of finish to the underside of the table. The finish isn’t just for looks – it also helps protect and preserve the wood.
Adding Benches to the Farmhouse Table
At this point, you have a complete table, but no way to sit at it. There are several options. You can build chairs or benches, or buy them.
I elected to build two matching benches and purchase chairs that matched. The reason for this was that I wanted the flexibility that came with benches. Farmhouse benches would allow me to cram a bunch of guests around the table if I was hosting. They work great for kids too.
I also wanted chairs though, because they are a lot more comfortable.
I elected to make two benches, and then I could rotate them in as needed with chairs that I purchase.
Here are the plans for the benches. You’ll notice they are the exact same design as the table, just with different wood products and dimensions.

I did everything the same way I did when I was making a dining room table, including sanding, staining, and finishing. These were a lot easier, probably because they were smaller, and I had already built a similar design in the DIY farmhouse table.


The DIY Wood Table Finished Product
In the end, the finished product turned out far better than I could have imagined. The table is incredibly sturdy, and the tabletop is incredibly durable.
I’ve had this in my house for 2 years now, and it is proving to be a wonderful addition. I’m really happy with the additional coats of finish that I added because the tabletop is withstanding my day-to-day activities quite well.
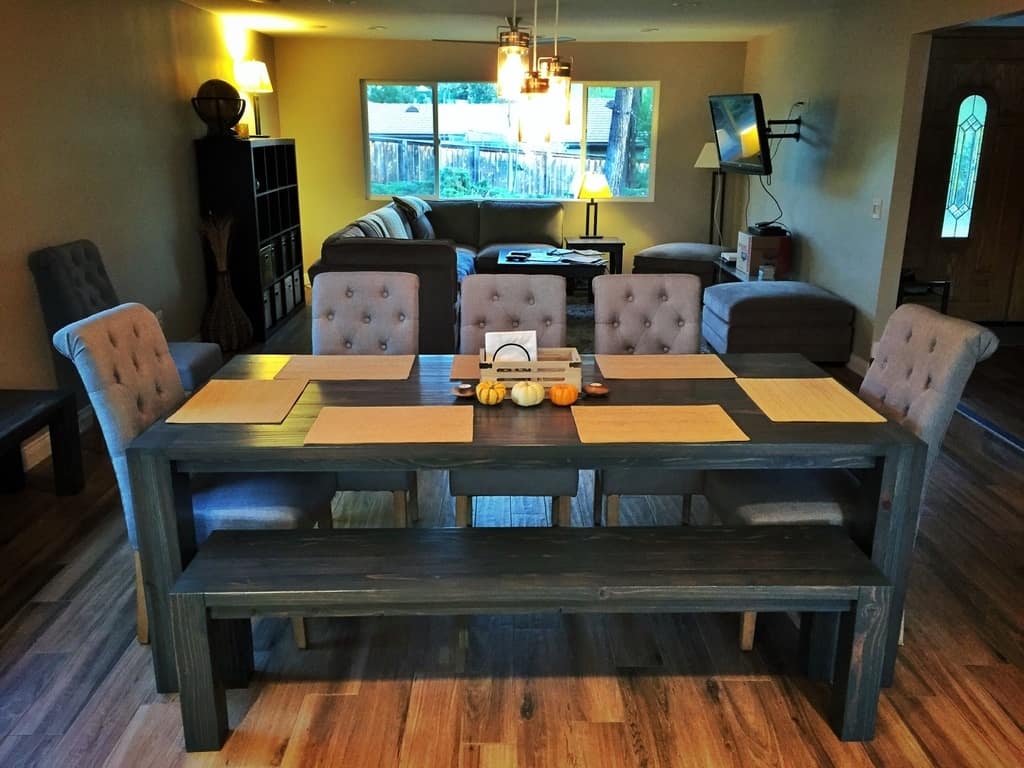
I ate on this table for all three meals a day. My kids do crafts on this table. I use this table to work from home sometimes. My wife loves making different homemade centrepieces to feature on it. I host dinners around this table several times each month.
A final note – I opted to use this table indoors, but it would work outside on your patio. I strongly considered it… is there anything better than sitting outside on a warm, summer evening under the patio lights?
I hope this walk-through of how to build your own dining room table has been helpful. If you have any questions or anything to add, please use the comment feature below! Happy woodworking!


Can I simply just say what a relief to discover somebody who truly knows what they are discussing on the net.
Great work- thanks for sharing – i would like to make it someday