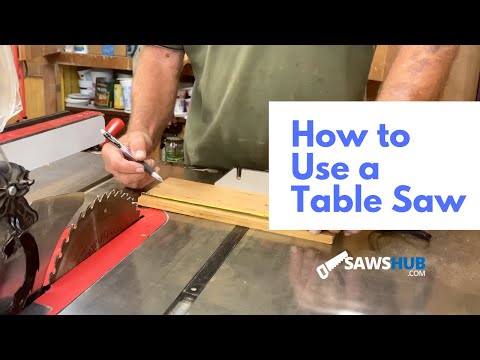
Tables saws come in a variety of sizes and the cutting surface can be made from cast iron or aluminum. The blade is embedded in the table, and can be raised or lowered to adjust the depth of your cut.
The table saw is a versatile tool that can be used to achieve bevel cuts in wood. The steepness of the bevel angle you wnat will determine the process you need. Bevel cuts less than 45 degrees can be easily cut using the table saw’s standard settings and a miter gauge.
Contents
Cutting a 60 Degree Bevel With a Table Saw
While many might opt for a miter saw for this cut, table saws are much more versatile than they appear at first glance. This project uses basic math and a custom made jig for your table saw to get 60 degree bevel cuts.
- Get to know your table saw. Most table saws have a wheel or lever under the cutting surface that adjusts the tilt of the arbor. The arbor is the shaft that holds the blade, so changing the angle of the arbor changes the blade angle as well. Table saw arbors are usually limited to a tilt of 45 degrees. The motor and its housing is always on the right side of the table. Depending on the model you choose, the blade may tilt to the left (away from the motor housing) or to the right (toward the motor housing).
- Think through the math. A straight cut plank presents a 90 degree angle for cutting, but the table saw blade can only be tilted up to 45 degrees. This technique for creating a 60 degree bevel cut depends on flipping the wood piece so that it rides across the table saw on it’s edge. In this configuration, you only need to cut away 30 degrees to leave behind a 60 degree bevel cut.

- Take off the miter gauge and attach the rip fence. Making perfectly straight cuts on a table saw requires some kind of guide. Most table saws come with two kinds of guides – a rip fence and a miter gauge. Miter gauges are installed perpendicular to the blade, and are used for making angled cross cuts. Rip fences are used to cut along the grain of the wood, and are installed parallel to the blade. For this project, I’ll be using the rip fence. To avoid kickback, the blade should tilt away from the fence. For left-tilting table saw models, the fence will be on the right side of the blade. If your blade tilts to the right, attach the fence to the left of the blade.
- Attach a jig. Jigs are used to guide workpieces during the use of tools. For this cut, you need to make a jig with a fence cover and a clamping board. The purpose of the clamping board is to hold the workpiece in place. The fence cover fits over the fence and holds the clamping board stable, but is not attached to the table, allowing it to slide with the workpiece. When in place, the jig should look like a backwards lowercase ‘h’.
- Adjust the table saw blade and fence. Use the adjustment wheel on the side of the table saw to raise or lower the blade. The blade should slide through the entire board, but not protrude more than ⅛ of an inch. Use the locking lever to slide the fence and the jig closer to the blade or further away. When measuring, make sure to take the size of the jig into account. You can also use a digital angle gauge to accurately measure the angle.
- Ensure your safety. Put on appropriate protective gear. Guard your hearing with earmuffs or earplugs. Your eyes are vulnerable to injury from flying wood chips, so goggles are a necessity. Turn on the table saw and let the blade start spinning before you introduce any material. Never turn on a table saw when the wood is already touching the blade.
- Place the face of the board against the jig. Bevels can be on the top or bottom face of the board. To cut the bevel into the top of the workpiece, align the bottom face against the jig. If you want the bevel on the bottom, press the top face of the board into the jig. Securely clamp the workpiece to the clamping board, positioning the clamps away from the area of the table sawblade.

- Using your jig and push sticks to keep clear of the blade, slowly and gently push the workpiece across the table, keeping it firmly pressed into the jig and the jig pressed against the fence. You may want to enlist someone to help you guide the workpiece as it moves across the table saw. Or, set up a couple of saw horses, so that your wood has something to slide across as it moves off the table saw tabletop.
- Turn off the table saw and inspect your bevel cut. You can use a speed square and a bevel gauge to measure the steepness of your bevel. If you’ve adjusted your table saw correctly, the bevel slope should measure 90 degrees.
Left-Tilt vs Right-Tilt for a 60 Degree Bevel Cut?
Comparisons of left-tilt vs right-tilt table saws reveal the advantages and drawbacks of each type. If you’re lucky enough to have access to both kinds of table saws, which one should you use?
When making bevel cuts, the blade should ideally tilt away from the fence. This prevents waste material from getting trapped between the workpiece, fence, and the blade, which can cause movement and kickback.
When presenting the board horizontally, this means a left-tilting blade is best. When you position the wood vertically, you can use either a left-tilting or right-tilting blade. If you are using a right-tilting model, simply move the fence to the other side of the blade.
Take a look at my table saw reviews to find the right option for your needs!
Frequently Asked Questions
How Do You Cut a Steep Bevel on a Table Saw?
To cut a steep bevel on a table saw, set the blade angle and height to the desired bevel angle and height, respectively. Use a sled or jig to safely guide the workpiece through the cut, keeping your hands and body clear of the blade. This type of cut can be dangerous, so be careful.
Conclusion
While table saw blades can only be tilted up to 45 degrees, don’t let this stop you from using the table saw for steeper bevels. To achieve a 60 degree bevel you’ll need to make a jig. Set the blade to a 30 degree angle and flip the workpieces onto it’s edge.
Use your jig to guide the wood across the saw. When the cut is finished, lay it flat and admire your 60 degree cut. Your hands are at risk whenever you use a table saw; always follow safety practices and use personal protective equipment.