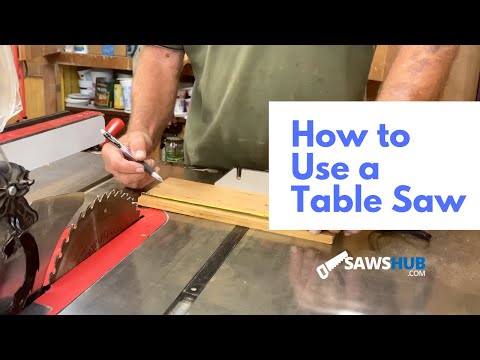
Whether you’re redoing your subfloor or making cabinets, odds are you’re going to be making lots of cuts. It may seem daunting to use a table saw for your plywood crosscuts at first, but the good news is it’s easier than you think and this guide is here to take you through the basics.
Contents
What Is a Crosscut, and Why Use a Table Saw?
To crosscut means to make a cut against the grain pattern of the wood. For plywood and other rectangular boards, this generally means you’re cutting it on the short side—not down its length, which would be considered a rip cut. Both crosscuts and rip cuts give you a 90-degree angle when finished (if you do it right) while a miter cut will give you a smaller angle.
While there are multiple different power tools you can reach for to make your crosscut, table saws offer several key advantages compared to jigsaws and even skill saws:
- More stability
- Better accuracy
- Faster cutting
- Longer blade life
All of these factors come together to give you cleaner, straighter cuts which will take your woodworking to the next level. Keep in mind that jigsaws are by far safer and even skill saws aren’t as likely to end in disaster, so make sure you’re always following the safety guidelines and using the proper protective equipment with your table saw.

How to Crosscut Plywood With Your Table Saw
“Measure twice, cut once.”
It may be a cheesy proverb, but it’s one to live by. Before you even think about cutting, double- and triple-check your calculations to make sure you’re not wasting time and materials. Don’t forget that the factory-cut ends of the plywood boards are rarely perfectly square, so plan to make new cuts on both sides.
Once you’re sure your measurements are sound it’s time to get everything ready and make your cut. The general process has been broken down into the following simple steps:
Step 1: Line Up Your Angle
Most table saws have angle indicators built into their miter gauge, and here’s some advice: don’t use them. You can get away with making short cuts using those angles, but for long cuts on plywood boards you’re going to want something more accurate. Instead, get yourself a drafting triangle.
To line up the angle, press one one leg of the drafting triangle against the saw when it’s raised all the way up and then square the miter gauge to the other leg by loosening the handle and adjusting it. Attach your fence to the miter gauge once you’re done.
Step 2: Position Your Saw and Board

A general rule of thumb is to set your saw to one tooth higher than whatever you’re cutting, however, to keep the top and bottom layers of your plywood from splintering you can raise the saw so that it’s a couple of inches higher than your board and use a zero-clearance insert. Please keep in mind that if you lift the saw you’ll have to be extra careful – more of the blade will be exposed, and no amount of splinter reduction is worth losing digits.
As for your board, you’re going to need to support it on every side that it hangs over significantly to make sure the wood isn’t bending and distorting your cut (the same goes for long boards and anything else that doesn’t entirely fit on the table).
You can use a sawhorse, a roller table, or any smooth surface that’s the height of the table saw to rest the board on. Position your board against your fence with the edge of the blade just barely beyond the edge, and then it’s time to cut.
Step 3: Rough Cut First, Then the Real Deal
You may feel the impulse to jump to your final cut first – resist it. Doing a rough cut to start is going to increase the overall accuracy of your crosscut and make your life easier when you do go to make your final cuts.
Shoot for 4-5 inches over your actual measurement to give you plenty of room to work with, lift your plywood on its end as you turn on your saw, and then lower the board make sure you keep it pressed against the fence as you make the cut.
Once the rough cut is done, turn off the saw before you remove the cutoff piece. Now the board will be easier to handle and maneuver for the real cuts, and just like the rough cut don’t forget to apply some pressure to keep the board against the fence. Repeat the same process for your final cuts, and congratulations—you’re now a crosscutting master!
For more tips and to see crosscutting in action, check out this video.

Making Other Cuts With Your Table Saw
Crosscuts are extremely valuable, but most DIY projects are also going to require rip cuts and miters. Fortunately, rip cuts are about as easy as crosscuts – you’re just cutting the long side of the board instead. You’re still going to want to make sure your plywood is well-supported on all sides, take precautions against splintering, and do your rough cuts first.
Miter cuts, on the other hand, present their own unique set of challenges. Instead of lining up the miter gauge to 90 degrees, you’ll adjust it to whatever the desired angle of the miter is before adding your fence. It’s crucial that you keep the board pressed firmly against the fence while you’re cutting since the saw will want to push the board away, and if you’re doing both square and miter cuts on the same board you’ll want to do the miter cuts first.
The Takeaway
In conclusion, to make a plywood crosscut with a table saw just line up your miter gauge, position the saw and board, and then keep your board level and pressed against the fence as you cut. Remember that rough cuts are your best friend, and your table saw can just as easily make a rip cut or a miter cut as well.