
A dust collector is an ideal way to keep your workspace neat and tidy. Whether you’re a weekend hobbyist or a professional working in an industrial setting, a buildup of wood debris and dust will be a hindrance.
One advantage of using a dust collector is that it will preserve the integrity of your tools. Even the best cheap table saw on the market would benefit from a dust collection system. You need a dust collector to prevent unnecessary build-up.
If dust accumulates, it can impact visibility, which can affect productivity. Dust particles in the air can also be a health hazard.
A dust collector will:
- Keep your woodworking tools safe and free of sawdust
- Keep your workspace clean
- Protect your lungs and respiratory system
Contents
What Is a Dust Collector?
A dust collector is a tool that collects the wood byproducts produced by power tools. Whether these are wood chips, wood shavings, or dust, it keeps the area where you’re working clean. The dust is stored in a container or plastic bag until it’s emptied out.
Dust collectors can:
- Connect to the power tool directly
- Be a vacuum that you use manually
Why Is a Dust Collector Necessary?
In 2002, the US government classified sawdust as a health risk. It’s on the list of known carcinogens after a documented series of lung cancer in professional woodworkers, even those wearing the top rated woodworking dust mask on the market. This is one very good reason why you should want to build your own cyclone dust collector.
A dust collector can prevent injury. Letting the sawdust pile up, even a few millimeters, can cause injury. A DIY dust collector will help you avoid slipping.

Moreover, excessive sawdust can also be fuel to start a fire – even a small spark can cause it. In rare cases, sawdust that is airborne can explode when it comes in contact with flying sparks or heat.
A sawdust collector will create a better, cleaner working experience.
While it is important to collect dust, it’s not necessary to spend a fortune and install hoses as well as other equipment in your work area. Building a dust collection system for your tools by yourself will help you stay clean as well.
In review, use a dust collector to
- Protect your lungs
- Prevent fires in your shop
- Keep things neat, tidy, and free of dust
- Protect your tools
How to Build a DIY Dust Collector with a Shop Vac
Get the Basics
At its core, a dust collector is a basic wooden box with an exhaust fan or blower attached. You then connect a length of hose from the tool to the fan. This collects the particulates and dust, and it deposits them into the sealed box.
In your beginning woodworking days, you can use a shop vacuum to create a centralized dust collection system at a discount. It will suck up most of the sawdust – you just simply have to sweep it up and vacuum it.
Quickly, you’ll begin to realize that this is a pain, though. Not only is it time-consuming, but you still have the challenge of sawdust covering everything else in your shop.
Universal Adapters
As a next step, learn that universal adapters make dust collection easy. You may be able to directly plug the vacuum hose into your tool’s dust port. However, that isn’t too common, as the dust port size on power hand tools will vary.
Your best strategy is first to buy a universal adapter. These are available at stores that sell accessories for shop vacuums and home centers. First, you cut the soft rubber with a knife so that it fits the dust port on the tool and the hose you’re using for the dust collection system.
- Try to buy tools with this port installed already
- Quick and easy cleanup
With the concepts of using a vacuum and universal adapter, let’s talk about building a DIY shop dust collector.
How To Build Your Own DIY Dust Collector without a Shop Vac
I’ve outlined two different ways to build your own dust collection system. The first is incredibly simple but not as effective. If possible, opt for the second option. It isn’t hard to set up – it is just a bit more involved.
Both options are very cost-effective, presuming you already have a shop vac you can use. Now, let’s see what to do if you don’t own one.
Simplest Option: Cloth Bag and Dust Port
The most basic type of dust collection system is a cloth bag attached to the dust port of a tool. A wet/dry vacuum connects to the dust port with a hose. When the hose is too big for it, you can use a reducer part to make it fit or even use duct tape.
- Seal the port, so there is a tight vacuum
- Only works with tools that have a dust port
Materials Needed
First, you will want to gather the necessary materials. The filter bag that is included with the dust collector does not trap the small particles that can be the most dangerous. Upgrading to a 0.5-micron filter quadruples the filter properties.
It also increases the surface area, which means there is more suction. With more suction, there are more wood chips and dust from your miter saw being sucked up.

Note that the ultra-thin filter is also ultra-delicate, and you don’t want any spare metal parts sucked up. The two-part dust collection system causes heavier pieces to fall into the trash can. The lighter materials are sucked up by the dust collector.
You’ll need:
- 2 hp dust collector
- environmental filter cartridge
- trash can lid
- large metal trash can
- 4” wide dust collection hose
- 4” hose clamps
Set Up Process
- Assemble the homemade dust collector from your materials.
- Set the filter in the center and hook it into place. This is now a single-stage collector.
The sawdust and wood chips go in through the 4” hose, they then spin in the filter, and the heavier stuff falls into the bag. Your two-step dust collecting system is good to go!
Adding a Pre Separator
As the filter bag fills, the suction power decreases because there is less surface area for the wood chips to stick to. Including a pre-separator to your design will save you money in the long run.
With this set-up, the heavy debris goes in the trash can, and the lighter stuff goes in the filter. Begin by assembling the unit – it is easy to build. The biggest challenge is cutting the holes in the lid. You can do this by using a 45-degree angle.
To be safe with the DIY dust separator, first ground the container to reduce the chances of sparks caused by static electricity. Run the bare copper wire through the container’s interior to connect it to the metal ductwork.
How to Build a Dust Collector System Under $20
This is my preferred option, and even though it is really cheap, it works really well. You’ll be making use of a couple of plastic buckets sealed with silicone caulk.
Materials Needed
Apart from getting a PVC pipe, plastic buckets, and a little silicone caulk, you’ll need a drill to get the holes the proper size.
You need to have:
- 2” PVC pipe
- Shop vac
- 2” to 1.5” PVC transition neck down
- Plastic tubing
- (2) plastic buckets
- Square wood piece
- Silicone caulk
- Caulk gun
- Drill
- Measuring tape
- Clamps
- Dremmel
- Exacto knife
- Pliers, bolts, screw driver

Set-Up Process
- Drill a circle out of the bottom of the bucket using a dremel. The hole should be 2” in diameter.
- Measure the length of plastic tubing. The length should correspond to the diameter of your bucket opening. Cut the tubing to size.
- Slice the tubing open using the Exacto knife. Think of this like filleting the plastic tube.
- Put the tubing on the bucket opening so that it creates a lip over the bucket mouth.
- Drill three holes in the bottom of the bucket, around the larger hole that you created with the dremel. These holes need to be the size of your screws and need to be adequately spaced so that you can drill the screws through your piece of wood and into the bucket.
- Caulk around these holes in a circle, and caulk a line from one hole to the other. Be liberal with the caulk.
- Bolt the piece of wood over the caulk and onto the bucket. Seal it as tight as you can. This helps the suction to be good as possible (which makes for a better dust collector). Use your screws for additional support.
- Cut the plumbing pipe to size and insert it into the opening of the dust collector system (bottom of the bucket).
- Next, on the side of the bucket, cut an oblong opening for another piece of PVC pipe. You will insert the pipe into this opening and seal around it, using a bolt and washer to secure it. This will help to create a cyclone effect when you are using the vacuum. You can attach it using a rubber washer. Creating a cyclone effect will help to save the filter inside your shop vac.
- Assemble the DIY cyclone dust collector by placing the modified bucket on top of the intact one. Use the clamps to secure them together.
- Insert the collection tube into the top PVC pipe to create suction. Then, use the other tube to create a way to collect the dust, usually by attaching this below your woodworking saw.
And there you have it, a very cheap and very effective homemade cyclone dust collector. This won’t win any style awards, but it works very well.

This simple dust collection system requires you just to sweep the dust on the ground and to collect it with the hose manually. It is affordable and easy to construct and will serve as a good home improvement project if you end up cleaning your home with it as well.
The two buckets create a large reservoir that you can use to keep your workspace neat and clean and to safely collect dust while you are working and while tidying up after a large project.
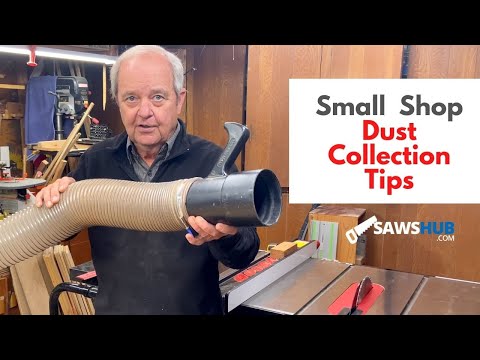
Dust Collection System Tips
Here are some key tips to keep in mind when building your own dust collection system.
Hang the hose
Clear space in your shop by installing an overhead hook to hold the hose. It keeps the vacuum hose off the ground or your work table. Doing this is safer for the hose and for you. This is especially good if you tend to work in one area because it will eliminate tangle.
- It takes minutes to hang the hoses, and it makes things clearer
- It’s simple to hang hoses and possible to make a removable system
Use a rake to collect wood chips
This will prevent the liner from getting sucked up into the cyclone and prevent it from tearing. Use a 2X4” wielded fence that fits inside the trash can.

DIY vacuum hose connectors
Instead of buying something to connect the hoses, you can cut the bottom of an empty one-pound coffee can and use it as a coupler. The can has rolled-steel edges, which are much stronger than the hose connectors you can buy in a store.
You can attach this to the hose with a screw-type hose clamp, and for a fitting that you can change quickly, then connect it to the 4″ hose with a 4″ spring clamp.
Steps to Build a Blast Gate Quickly
Here is a step-by-step process for making a blast gate.
- The first step is to cut pieces from a 1/4″ Baltic birch plywood and make 4 ½” holes with a circle cutter.
- After that, glue the plywood spacers and clamp them to one of the 7X7″ pieces of plywood.
- Next, cut a 4″ section of PVC cold-water drain coupling in two pieces and epoxy the matching halves in the 4 1/2″ holes, making sure that they are flush with the inside part of the plywood.
- When the epoxy and glue cure completely, put together the two halves of the blast gate with brads and glue.
- Then, slide this gate into the housing, and you can connect your dust collection hoses.
Sift Through the Dust
While you may not think of a backyard garden rake as a shop tool, it can come in handy when you’re working. Go through the pile of dust that is left over after you work.
It will sift out the larger pieces that can cause damage to the filter or the hose as well as any spare metal pieces that may have made their way into the pile.
Good luck with your new dust collection system!