Most people like spacious homes with big walls and high ceilings as they make a house look grand and majestic. But having such a big house requires a commitment not only to keep the house clean but also to paint it when needed.
The high places of such a house are hard to reach and painting them is a challenging task because not everyone has a ladder that big. Even if you do have a tall aluminum or fiberglass ladder, you’ll need assistance from another person to move and hold the ladder in order to get the job done.
Additionally, ladders can also be dangerous if you’re not a professional as you’ll have a constant fear of falling. That’s why I have compiled a list of easy steps that you can follow to paint high places of your house without a ladder.
Contents
How to Paint High Places Without a Ladder

Ideally, you should paint your walls every three to five years to keep them from looking dingy. The following method will allow you to paint high places in your house (or any other place) without needing to use a ladder.
Supplies You’ll Need
- Primer (Optional)
- Container or Tray
- Painter’s or Masking Tape
- Paint Roller
- Angles Paint Brush (with Threaded Handle)
- Screw-on Extender Pole
- Drop Cloths
- Plastic coat, face mask, latex gloves, and safety goggles for protection
Step 1: Wear Appropriate Clothes
It’s easy to get paint on your clothes, especially when you dive into a project to paint a high place without a ladder. The paint drips and splatters are unavoidable and that’s why you should wear old clothes that you no longer use.
If you don’t have older clothes, consider wearing a plastic coat. It’s also important to wear a face mask, latex gloves, and safety goggles to protect yourself from paint.
Step 2: Prepare the Area
Once you have taken safety measures, you need to prepare the area where you want to paint. The purpose of this step is to protect your furniture and floor from spills and splatters.
- Use drop cloths to cover the floor and furniture. If it’s possible, move your expensive furniture items to another room or area.
- Remove everything from walls such as light fixtures, ceiling fans, and picture frames. Make sure that you switch off the electricity before you start dealing with the light fixtures and ceiling fans.
- After that, cover the switchboards using masking or painter’s tape.
- Don’t forget to cover your baseboard molding with the painter’s tape as well.
Step 3: Attach Paint Roller to an Extender Pole
Grab your paint roller and attach it to the top of your screw-on extender pole. Make sure your extender pole is long and extends enough so that you can easily reach even the highest spots.
Most extender poles have push-button control that you can use to increase the height. You can easily buy all the supplies needed for painting from any local hardware store.
Step 4: Prime the Walls
A high-quality wall primer prepares your wall for the painting process. Prime formulas look like paint, but they have a high concentration and cover the surface to make it smooth. A primer is like a piece of gum that allows the paint to stick to the surface properly.
While it’s an optional step, I recommend you perform it if your wall is porous, glossy, damaged, dark, stained, or has an odor. After applying the primer, you’ll need to leave it for some time to dry thoroughly.
Most primers need about 30 minutes to one hour to dry. I recommend you read the user’s instructions on the primer’s can to find out the exact time.
Step 5: Start Painting
Attach your cut-in brush to the top of your extender pole. Make sure that you use the angled paint brush that comes with a threaded handle. It’ll allow you to attach it to the extender pole conveniently.
Pour the paint into the container or tray and dip the brush bristles right into the paint. Stretch the extender pole with the angled brush as high as you can, and start applying a fresh layer of paint.
It’s easy to achieve a professional look. Simply cut in with your angled brush and softly fan your brush’s bristles out while directing the brush along the borders. You’ll need to gradually overlap certain portions to remove blemishes until the paint job looks even. Don’t pick too much paint on the angled brush to avoid drips and wastage of material.
Note: You can simply use the paintbrush with your hands to paint the low corners of the wall.
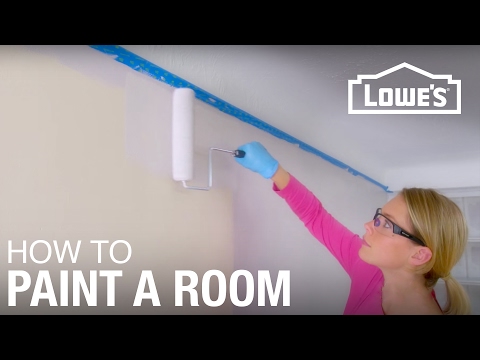
Step 6: Switch to Rollers
Once you’re done with borders, switch to the paint rollers again and start painting the ceilings and remaining walls. Your goal here is to blend the paint coverage into previously brush-painted areas.
Don’t rush the process and don’t use too much paint, especially while working with rollers, or you’ll end up with an uneven and rough coat of paint.
Step 7: Remove Tape
It’s important to remove the painter’s or masking tape immediately because the longer it stays on the harder it becomes to remove it. In addition, it can also damage your paint job by taking off dried paint.
After removing the tape, let the paint dry for at least six to eight hours. This duration can vary depending upon the type of paint you used. Read the user’s manual of your paint to find the exact time.
Step 8: Clean Up
Clean your paint brushes, extender pole, and roller immediately once you have finished painting so that you can use them again whenever needed. Remove the drop cloths, move your furniture back to the room, and reinstall light fixtures and ceiling fans once the paint has dried thoroughly.
Safety Tips to Keep in Mind While Painting

Keep the following safety tips in mind while painting high places without a ladder to avoid accidents and unwanted scenarios.
- Some paints come with organic compounds while others can have harmful chemicals and that’s why wearing a face mask, safety goggles, and latex gloves is important.
- Make sure that the area you need to paint has proper ventilation by opening windows and doors.
- Keep your kids and pets away while you’re painting. Don’t allow them to go to the newly painted room until the paint has dried thoroughly.
- Keep paint materials away from heat and don’t smoke while painting to prevent fire hazards. If you really need to use something inflammable, make sure you have a fire extinguisher nearby.
- Keep a piece of foam or rag handy to clean the paint splatters and drips because they can make you slip and hurt yourself.
- Follow the paint manufacturer’s instructions carefully to ensure safety and achieve the best results.
Final Words
Using an extender pole is one of the easiest and fastest ways to paint high places without a ladder. Whether you’re afraid of heights or simply don’t have a ladder, you can use the steps discussed above to paint high places efficiently.
There are plenty of DIY wall painting ideas that you can use to paint your house and give it an eye-catching look. Read the paint manufacturer’s instructions carefully and take the safety measures before starting the process. It’ll allow you to complete the painting project in the shortest possible time without risking your safety.