Brass is an alloy that has been around for thousands of years. As technology has improved the number of applications brass is used for has grown exponentially. Given brass’s wide range of uses, a variety of cutting methods are necessary depending on how you want to use brass in your project.
If you need to cut brass, I have advice on how to cut a wide range of common brass applications.
Contents
Types of Brass to Cut
Brass is highly malleable. It is more easily shaped into a variety of forms than other common household metals like steel or iron. Brass also tends to be less brittle than aluminum. Brass resists corrosion, is naturally antibacterial, resists corrosion, and can transfer electricity easily.
Four of the most common brass applications most DIYers will run into are brass tubes, brass rods, brass sheetings, and brass fittings. If your brass has a finish like lacquer, you’ll want to remove it first.
How to Cut Brass Rods
Brass rods have decorative applications. The bright, reflective sheen makes its ideal for outdoor ornamentations. Because of its resistance to corrosion, brass is a wonderful medium to work in if you want to create windmills or shiny flowers for your garden beds.
Brass rods come in a variety of thicknesses. Brass rods in their smallest gauges can be used to repair internal parts of clocks and watches. Larger brass rods can come in a variety of shapes with circular, hexagonal, square, and flat being most common.
The creative DIYer can mix-and-match shapes to create a wonderful outdoor decoration. Brass also has a low melting point for any aspiring blacksmiths.
Tools:
The necessary tools for this job depends on the gauge and type of brass rod you plan to cut.

Tools for Brass Rods #8 Gauge and Narrower
- Safety glasses
- Fine-point, black marker
- Wire cutters or side cutters
- Medium to super-fine sandpaper or sanding block
Tools for Large Circular or Specially-Shaped Brass Rods
- Safety glasses
- Hearing protection
- Fine-point, black marker
- Metal-cutting miter saw blade
- Miter Saw
- Clamps
Method:
The method for cutting brass rods will depend largely on the thickness and type of rod you hope to cut. For a round, 8-gauge brass wire or smaller, a pair of quality wire cutters will get the job done. Twenty-four inch bolt cutters can reliably cut brass up to 1/2″ thick.
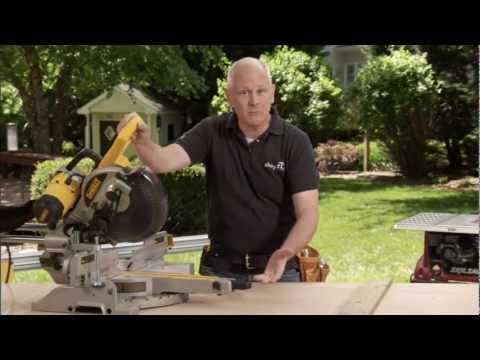
For specially-shaped rods or round rods larger than 1/2″ you can use a powered miter saw. However, the miter saw needs to be equipped with a carbide-tipped metal cutting blade.
Cutting Small Gauge Brass Rods:
- Measure the length of rod you need to cut.
- Mark where the wire needs to be cut.
- While wearing safety glasses, use wire cutters or side cuts to cut at your mark.
- Sand away sharp burrs or ends left behind by the cut.
Tip: I recommend sanding away burrs or sharp points left behind by cutting by using medium-grit sandpaper, then progressing to super-fine grit.
Cutting Large Gauge or Specially-Shaped Brass Rods
You don’t need a particularly powerful miter saw to cut through brass, due to the fact that it isn’t a hard metal.
- With your powered miter saw unplugged, install your metal-cutting blade per manufacturer’s instructions.
- Measure the length of rod you need to cut.
- Mark the location of the needed cut.
- Place the rod along the fence of the miter saw.
- With the miter saw unplugged, lower the blade to ensure you are cutting on your mark.
- Carefully clamp your brass rod into place.
- Plug in your miter saw.
- Put on safety equipment including safety glasses and hearing protection.
- Squeeze trigger to power the blade up to full speed.
- Steadily lower the miter saw blade into your rod. Allow the saw to do the work as it cuts through the brass. Do not force the blade through the brass rod.
Tip: Sand away burrs and sharp edges after cutting using progressively finer grits of sandpaper.
How to Cut Brass Pipes
Brass piping, also referred to as brass tubing, is commonly used for home plumbing but can also be used to create custom railing and racks. Brass tubing comes in a wide variety of sizes.
For brass pipes I strongly recommend using a tubing cutter. Because brass pipes can be easily bent, I do not recommend using a powered miter saw even if it is equipped with a metal-cutting blade. However, a jeweler’s miter can be used.

Cutting Brass Pipe with a Tubing Cutter
Tools:
- Tubing cutter sized to fit your brass pipe.
- Neoprene gloves
- Safety goggles
- Several grits of sandpaper from medium to super fine.
Method:
- Measure and mark the length of pipe you need to cut.
- Make sure your tube cutter blade is retracted.
- Put on gloves and safety goggles.
- Rest one end of the pipe on a stable surface with the end to be cut over empty space parallel to the ground.
- Place the tubing cutter on the pipe and slowly lower the blade onto the pipe until it makes light contact.
- Spin the tube cutter around the pipe several times.
- Tighten the blade of the tube cutter.
- Spin the tube cutter around the blade.
- Repeat steps 6 and 7 until the pipe is cut.
- Sand away burrs and sharp edges.
Tip: An easy way to mark a mark around a tube is using masking tape. Wrap the tape around the pipe where one edge aligns with your mark and the tape edge aligns with itself. This will create a straight line around the pipe.
Using a Jeweler’s Miter to Cut Brass Pipes
If you are dealing with an unusual diameter of brass pipe that will not fit neatly with standard pipe cutters, there are several versions of jeweler’s miter saws that you can buy. Nearly each of these miters include a brass-appropriate blade and vise to hold brass pipes in place.
We recommend jeweler’s miter saws that allow for at least 90-degree and 45-degree cutting and clamping. The delicate hand saw included with a jeweler’s miter will make short work of small gauge brass pipes.
Tools:
- Jeweler’s Miter Box
- Jeweler’s hand saw
- Protective goggles
- Measuring tape
- Fine-tip marker
- Cutting oil
- Fine-grit sandpaper
Method:
- Measure and mark the length of brass pipe that needs to be cut.
- Clamp the pipe securely in place within the jeweler’s vise aligning your measuring mark with the appropriate slot in the miter.
- Gently move the hand saw within the miter slot applying steady force to your brass pipe. Do not force it. Apply cutting oil if necessary.
- Sand burrs or sharp edges with fine-grit sandpaper.
How to Cut Brass Sheeting
Brass sheeting can make an incredible cladding for a kitchen countertop. Brass is durable and naturally antimicrobial. It can be molded and stretched into place to form a tight fit.
Cutting brass sheeting can be a simple affair if you have the space and a quality pair of tin snips.
Tools:
- Tin snips
- Neoprene gloves
- Safety goggles
- Straight edge or framing square
- Erasable Marker
- Clamps if necessary
- Super-fine sandpaper
Method:
- Mark out your cutlines with a straight edge or erasable marker.
- Clamp an edge of your brass sheeting away from where you will be cutting.
- Put on safety goggles and gloves.
- Cut along your marked lines with tin snips.
- If necessary, use super-fine grit sandpaper to clean up any sharp edges.
Conclusion
When it comes to working with metal at home, brass can be one of the most forgiving thanks to its malleability and natural resistance to corrosion. Brass is also much cheaper to work with than gold or silver. With the right combination of tools and safety gear, brass can easily be cut to complete your DIY projects.