Building a tall cabinet with doors can serve a host of functions within anyone’s workshop or home. It is an ideal place to tuck away yard implements like rakes, shovels, and hoes. With the easy addition of a dowel rod it could quickly become a wardrobe.
Outfitted with shelves, the cabinet can help organize your workspace. If you have interest in constructing a tall cabinet with doors, I have a guide for you.
Contents
Constructing a Tall Cabinet with Doors
Making a quality tall cabinet efficiently requires investing in the best materials and utilizing woodworking power tools. The guide outlined here can be adjusted depending on your available space and needs.
We will construct the exterior of the tall cabinet along with doors. Organizing the interior of the cabinet will be left up to your imagination.
Tools Need to Create a Tall Cabinet
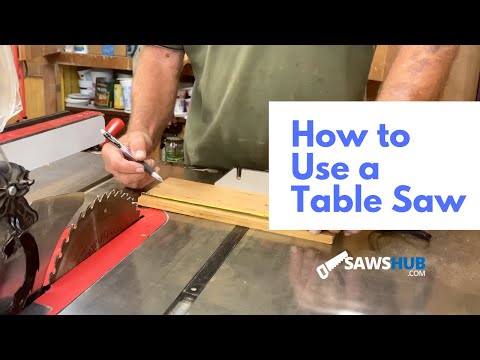
The ability to cut plywood panels and boards to size is a must for this project. Access to even just a beginner table saw will help you precisely make the required cuts. If you do not have access to a table saw, I have two recommendations.
- Most woodworkers have access to a jigsaw. Using a jigsaw to make the cuts will work, albeit they won’t be as precise. It will also take you awhile. But you can pick up a great jigsaw for under $100, and utilize it for a variety of different cuts.
- Use a track saw or circular saw. You can create a track for the circular saw by clamping a straight board across your cutting surface. Use the straight board as a guide for your circular saw. Remember to calculate the distance from the edge of the main shoe to the saw blade when clamping your straight board into place.
Aside from a table saw or circular saw, you will need the following materials:
- Safety gear including eye and hearing protection
- Tape measure
- Basic Miter saw
- Corded or Cordless Jigsaw
- Pencil
- Cordless or Corded Drill
- Assorted drill bits
- Pockethole jig
- Box of 1 ¼” wood screws
- Wood glue
- 6 cabinet door hinges
- Hook-and-eye latch
- Cabinet anchoring kit
Wood Cuts List
Before beginning assembly, obtain the following pieces from 3/4″ plywood. I highly recommend getting cabinet-grade plywood.
For boards, cedar offers natural anti-rot and anti-fungal properties. It also looks beautiful with a coat of polyurethane.
Redwood offers similar features, and you can add a great stain color for redwood that will compliment its unique coloring.

Whatever species of lumber you opt for, make sure boards are straight with no crowning or cupping. Boards with tight grain will likely be stronger than open-grain boards. You will need 1 1/2 sheets of plywood for these cuts.
| Cut | Cut Type | Location |
| 1. | (4) – 2” x 2” lumber – 75” | legs |
| 2. | (2) – 3/4″ plywood – 12” x 72” | side panels |
| 3. | (1) – 3/4″ plywood – 24” x 72” | back panel |
| 4. | (1) – 3/4″ plywood – 15 3/4″ x 28 1/2″ | top panel |
| 5. | (1) – 3/4″ plywood – 13 1/2” x 25 1/2” | bottom panel |
| 6. | (2) – 1/2″ plywood – 11 7/8″ x 71 7/8″ | doors |
Use a square to ensure that all corners are smooth 90 degree cuts. You could use a roundover bit on a router to smooth three long edges on each of your legs if you wish.
Assembling the Tall Cabinet with Doors
For these steps I recommend finding a level surface on which to complete your work. After gluing and screwing pieces together, you can apply clamps as extra measure. The pockethole screws should provide plenty of pressure for strong glue bonds.
Side Panels
On a level surface, use your pockethole jig drill holes on the long edges of your plywood side pieces. I recommend pockets holes every 8” along each edge.
Apply wood glue to the mating surface between the plywood and legs. The plywood sides should align with the top of the leg pieces, leaving 3” of leg beneath each side panel.
Allow the glue to cure before moving onto the next step.
Back Panel
Using the pockethole jig, create holes every 8” along the long edges of the plywood.
Apply glue to the mating edges of the back panel and side panels, then stand the side panels on edge.
Use screws through the pocketholes to pull the back and side panels together.
For extra stability, you can tack 1” x 3” boards across the open span between the side panels using finishing nails. This will prevent the sides from moving and straining their connection with the rear panel.
Top Panel
Use the pockethole jig to drill holes every 3 inches along the tops of the side and rear panels.
With the bottom panel resting on a level surface, apply glue to the top of the side and rear panels.

Then, attach the top panel to the cabinet from using screws through the pockethole to apply pressure.
The top panel should overhang each side of the cabinet by 1/2″. The top panel should extend past the front of the cabinet by 3/4″.
Bottom Panel
Use a jigsaw to remove a 3/4″ x 3/4″ square from each corner of the bottom panel.
For extra strength on the bottom panel, you will drill pocketholes on the inside bottoms of the side and rear panels along with pocketholes on the bottom side of the bottom panel itself.
Make sure these pocket holes are offset.
Pockethole guide for attaching the side panel and bottom panel:
- Along the bottom of a side panel, mark a point 2 inches away from the leg.
- Drill a pockethole at that point.
- Drill a pockethole at every 3” after that (at 5 inches, 8 inches, and 11 inches).
- Repeat for the other side panel.
For the back panel:
- Along the bottom of the back panel, mark a point 2 inches away from the leg.
- Drill a pockethole at that point.
- Drill a pockethole at every 3” after that (at 5”, 8”, 11”, 14”, 17”, 20”, and 23”)
For the bottom panel:
- Along the 12” side of the bottom panel, mark a point 1 inch away from a leg.
- Drill a pockethole at that point.
- Drill a pockethole every 3” after that (at 4”, 7”, and 10”)
- Repeat for the other 12” side
- Along the 24” side which will attach to the back panel, mark a point 1” away from a leg.
- Drill a pockethole at that point.
- Drill a pockethole every 3” after that (at 4”, 7”, 10”, 13”, 16”, 19”, and 22”)
With the many offset pocketholes drilled, glue the mating surfaces where the bottom panel slides within the legs to meet the side and back panels of the cabinet. Attach the bottom with screws.
After the wood glue has dried, it is time to complete the project by hanging doors.
Installing Cabinet Doors
Attach the 3 cabinet hinges to an outside edge of each cabinet door made from 1/2″ plywood. You can use a cabinet hardware jig to make short and accurate work of this.
The top hinge should be 5” from the top of the door, while the bottom hinge should be 10” from the bottom of the door. The center of the third hinge should be at 38.5” from the bottom of the door.
After the cabinet hinges are installed on the door, stand up the cabinet. Have a friend help attach the hinges to the cabinet frame.
Leave a 1/4″ gap between the top of the doors and the top panel of the cabinet. Use a simple hook-and-eye latch to keep your new cabinet doors shut.
Conclusion
Congratulations on creating a tall cabinet with doors. The inside of your cabinet can be customized to fit your needs. Remember to secure your tall cabinet to the wall using an anchoring kit to prevent your cabinet from tipping over.