Stripping old finish off a project piece before restaining can be a tedious, labor-intensive, and time-consuming task. Can you stain over varnish to avoid the extra work, or is it a prerequisite that the old finish must be stripped off first?
Contents
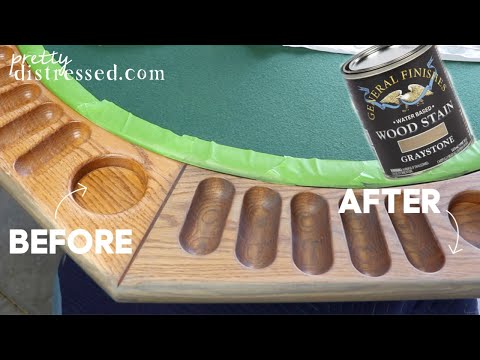
Can You Stain Over Varnish?
Yes, you can stain over varnish, but it requires proper surface preparation to ensure adhesion. First, lightly sand the varnished surface with fine-grit sandpaper to remove gloss and create a rough texture. Then, clean the surface thoroughly, and apply a gel stain, which adheres better to varnished surfaces. Finish with a clear topcoat for protection.

You might want to stain over varnish for several reasons, such as changing or refreshing the color of a project. The outcome will largely depend on the quality of the original surface.
If you’re aiming for a high-quality wood finish, I recommend stripping the old finish off the wood for a clean slate. However, if the piece doesn’t require a top-notch finish, staining over the varnish is an acceptable shortcut.
Another option to consider is painting over varnish, which provides a durable, solid coating with even less effort. For more guidance on this process, take a look at my comprehensive article on painting over varnish.
Can You Stain Over Varnish Without Sanding?
As an experienced woodworker, I understand that sometimes you might want a quick solution for updating a varnished piece. Staining over varnish without sanding can be done (although it isn’t recommended), but there are essential steps to follow for a successful outcome:
- Use a liquid deglosser: This product removes the glossy finish and helps create a rough surface for better stain adhesion.
- Clean the surface: Ensure it’s free of dirt, dust, and grease.
- Choose the right stain: Gel stain is your best bet since it adheres well to varnished surfaces without the need for sanding.
- Apply the stain: Follow the manufacturer’s instructions for the best results. Use a brush or cloth to apply the stain evenly.
- Finish with a topcoat: Apply a clear topcoat to protect the new finish and enhance its durability.
Keep in mind, staining over varnish without sanding might not yield the same high-quality result as when proper sanding and surface preparation are done. The stain might not penetrate as deeply, and the final look could be less consistent.
If you’re working on a piece that requires an exceptional finish, I recommend taking the time to sand and prepare the surface. However, if you’re looking for a quick solution, following the steps above should give you a decent result. Just remember, the final outcome might not be as polished as a fully sanded and prepared surface.
What Is the Best Stain to Use Over Varnish?
There are essentially two options to use when applying stain over varnish. The first option is to apply a standard stain in several coats until the desired color is achieved and then seal the wood with a final coat or two of varnish.
With this option can use a standard wood stain, but my preference is to use gel stain, such as General Finishes Gel Stain, which goes on thicker and covers blemishes and imperfections more effectively.
The second option, which is my preferred option, is to use a two-in-one product that combines a wood stain with a polyurethane finish.
A product such as MinWax PolyShades is designed to be applied directly over varnish without the need to strip the old finish and contains stain within the finish to reduce the work and drying time needed to finish the project.

What Are the Steps to Appy Stain Over Varnish?
Staining over varnish is definitely a faster process than stripping the finish and starting from scratch, but there are some basic steps that should be followed to get the best possible finish on the wood.
1. Prepare the Surface for Staining
Most woodworkers know that surface preparation is the cornerstone of a good finish, and the same principle applies to this process.
Lightly sand the varnished surface to roughen the top varnish coat and smooth out imperfections in the finish. Use a 280-grit or higher sandpaper so you don’t score the varnish too deeply or remove too much. Think of smoothing the surface rather than stripping the varnish.
After lightly sanding, clean the surface thoroughly to remove any sanding dust on the surface. A slightly damp cloth is a good method for cleaning the surface, or using a shop vac to suck up the dust.
The cleaner the surface is after the sanding process, the smoother the stain and finish coats will go onto the wood.
2. Apply the Stain to the Wood
Once the surface is clean, the next step is to apply the stain. If you are using a gel stain, the best method is to use a sponge applicator or a soft paintbrush.
If you use a standard stain, applying it in the usual way with a cloth will work. Allow the stain to dry and apply subsequent coats to attain the desired color on the wood.
When you use a two-in-one product that includes stain and finish, the best method of application is with a soft natural bristle brush.
Apply the product in a thin layer across the surface to prevent bubbles and brush marks in the final finish.

Let the first coat dry for 6 hours or overnight before applying a second coat. Dry time may vary depending on the local humidity conditions, ventilation, and temperature. If the coating is applied too thick, the dry time will also be extended.
Lightly rub the surface of the first coat with fine steel wool, at least grade 000. Clean the surface of any dust and brush on the second coat. The color will deepen with the number of coats added to the wood.
3. Apply a Protective Finish Coat
If you used a two-in-one product that includes a stain in the finish, you do not need to complete this step to protect the wood. Once the coats in the previous step are dry, the wood is stained and protected.
If you only used a stain in the previous step, you must add a finish coat to protect the wood and provide a durable, lasting surface. You can use any polyurethane finish or traditional varnish to complete the project.
Applying two or more coats will provide a quality, smooth, satin-feel finish to the surface of the wood.
Conclusion
Staining over varnish is an option if you what to shortcut the process and avoid stripping the old finish off the wood. The final finish using this method will not look as professional as a complete makeover, but it is a useful option in some cases.
Surface preparation is the key to success in achieving a good look when staining over varnish, and choosing the right product can further shorten the process!