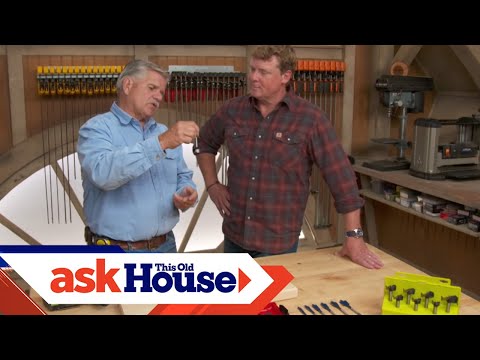
A step drill bit is an interesting type of bit that is intended to start a small hole, and then expand it into a larger hole. It is important to learn when and how to use a step drill bit when considering cutting into different types of metal fabrication and some harder woods.
Contents
How to Use a Step Drill Bit
The perfect application for this kind of bit is a thin sheet of metal where a hole needs to be drilled wider than a typical straight bit diameter can achieve, such as when routing conduit.
Step drill bits remove the need for different sized bits in most applications other than extremely large diameter holes. You will not need to start with a pilot hole, nor switch bits out for a larger bit, or even sometimes an even larger one.
They are also more accurate than using multiple drill bits, since the center will stay in the same place and create cleaner holes.
Select the Correct Step Drill Bit For Your Needs
Just like standard drill bits, step drill bits are constructed differently for different materials. Wood is in its own category of step drill bits, but different types of metal such as steel, aluminum, and other alloys all require a different type of bit material.
Using the wrong drill bit can cause damage to either the bit or the material you are drilling, and if it is not hard enough, may not even be able to cut through.
Tools Needed to Use a Step Drill Bit
- Eye Protection
- Flat Work Surface
- 2 Wood Blocks
- Table Clamps
- Felt Marker or Grease Pencil
- Center Punch
- Hammer
- Step Drill Bit
- Drill
- Tapping or Cutting Fluid
- Shop Rag
Safety When Drilling With a Step Drill Bit
The cutting edges of a step drill bit are designed differently than the normal bit, with an acute angle and multiple levels of cutting surfaces. Because of this, the material that you are drilling can come off in unpredictable ways.
Most of the time the metal shavings will simply fall to the floor, but some can kick up if caught by the spinning drill.
Eye protection is very important. When working with metal especially, be sure that your glasses or safety goggles do not just protect against dust, but are also impact resistant.
Work gloves are also a good idea when working with metal, as rough, sharp edges can cut skin fairly easily. They also come in handy when picking up the metal shavings that love to jam themselves into your fingers.
Preparing to Use a Step Drill Bit
A little preparation can go a long way when drilling. Make sure you are in a well-lit area with enough room to move around the project.
- Mount the piece to be drilled sandwiched in between two wood blocks clamped on the workbench. The bottom block should be directly under the area to be drilled – make sure it is thick enough to prevent the bit from going through the entire block.
The piece on the top is to protect the material being cut from the table clamp, and also to distribute the clamp force across a wider area for safety. - Measure and mark the center of the area to be cut. Use a marker, grease pencil, or simply scratch the material with something like a nail.
- (Optional) Mark an exterior circle that matches the diameter of the hole you wish to cut. If you are not comfortable with keeping track of which step you want to drill to, this will help you know when to stop drilling.
- Center a hole punch on the mark and strike it with a hammer. It does not need to punch completely through the material, it just needs to make a divot that will center the step drill bit.
Note: This is only for drilling in metal. For smooth materials such as acrylic, use two layers of masking tape to create a rough surface that the bit can bite into. For wood, you can often start with just the bit, but a shallow pilot hole would be helpful.
Drilling with a Step Drill Bit
- Attach the correct bit to the drill following the drill manufacturer’s instructions.
- Look at the side of the step drill bit. There should be markings showing what diameter each step is. Keep a mental note as to which step you want to drill to.
- Lubricate the bit with tapping fluid.
- Center the drill bit perpendicularly on the mark that you have previously punched.
- Start drilling. You may need to use a fairly high number of RPMs (Revolutions Per Minute) to get through the metal, depending on what material it is made from.
- If the drilling is going to be more than a few steps deep, take breaks and re-lubricate the drill bit every so often. This will keep the material from heating up and warping, as well as extending the life of the bit and the drill.
- If needed, change the first drill bit with a larger one to reach the desired diameter.
After Drilling
- Clean up any scrap material and dust surrounding the hole. The pieces may be sharp, so use gloves or a shop rag and dispose of properly.
- Unmount the drilled material and check the underside. There will often be a rough edge protruding called tear-out. If so, re-mount the material with the rough edge facing up. Using the same bit, center it in the hole, press down slowly and “kiss” the rough edge without drilling through the metal. This will remove that excess material.
- Clean the material and area thoroughly. Again, these metal shavings will be sharp, so use the appropriate precautions.
Additional Tips for Using a Step Drill Bit
- In holes that need to be expanded, a step drill bit is the perfect tool to use. Check that the steps on your bit are wide enough, center the drill on the original hole, and drill to the desired step.
- Step drill bits can be sharpened if their performance starts dropping. This is a difficult procedure and could be done at home, I would recommend sending it out to a professional sharpener.
- Consider oiling the bit after drilling through metal. This can help keep the step drill bit from rusting.
- If there is any damage on one of the steps of the bit (such as chips or jagged edges), you can still use it, but only up to the step before the damage. Otherwise they will leave messy, jagged cuts, and may damage the material.
- When drilling through thicker materials, a step drill bit can leave a conical shape in the material, where the diameter on one side is wider than the diameter on the other side. When this occurs, simply flip the material over, and drill the same hole to the same step that you drilled on the first side.
- Hole saws can sometimes be used for applications like these, I am often dealing with hard to cut materials like metal alloy. Most hole saws are not strong enough to get through, may break teeth, and will leave a much rougher edge.
Take a look at my drill press for metal reviews to find another option that works well.
Conclusion
Although a step drill bit looks very different from standard bits, the basic drilling concept is the same – start drilling until you reach the desired result. The same safety precautions and setup are used, so if you are familiar with using a drill, moving to a step drill bit for specific projects should not be a problem.