Many DIY projects around the home involve woodwork. These include putting up new fences, sheds and decks in the garden, and repairing old benches and porches.
When you’re spending your time and money completing these projects, you want them to last. That’s why I’ve put together this guide to preserving wood. You can use this to help you select the right type of preserver and apply it correctly.
Contents
Why Do You Need Wood Preserver?
Wood that’s used outside will be exposed to all weathers including rain, frost and bright sunshine. Contact with the ground means it can also absorb ground moisture, causing it to rot. Fungi, algae and insects are also likely to cause damage. So, protecting your wood will prolong its lifespan and help retain its appearance.
Common types of wood damage are:
- Wet rot caused by excess moisture
- Dry or brown rot caused by fungi
- Mold caused by damp conditions
- Woodworm and wood boring insects
- Fading

Different Types of Wood Preserver
Using wood preserver can prevent warping, rot, mold, and insects from occurring. But there are different types of wood preserver available: some are designed for industrial use only and some only protect against superficial damage.
- Water-Borne Wood Preserver is a chemical treatment using metallic salts. Although generally odor and residue free they can contain CCAs (chromated copper arsenate) which have a high toxicity. The use of CCAs is now restricted but you may have some in your workshop or shed. So, check the label before using.
- Oil-Borne Wood Preserver is usually reserved for commercial or industrial applications as it uses petrochemicals and has a strong odor. It provides a long lifespan of around 40 years. If you’re using reclaimed wood for a project, it may have been treated with creosote or a similar oil-borne preserver. This type of reclaimed wood is unsuitable for raised garden beds or children’s play equipment.
- Wood Acetylation is a newer, non-toxic treatment that essentially pickles wood to prevent it taking in or releasing moisture.
How to Choose the Right Wood Preserver
Not all preservatives protect wood in the same way. And the type you choose needs to match your wood or project. Here’s what you need to check before you buy a product:
- Is it suitable for exterior or interior woodwork?
- What does it protect against? Does it kill insects and seal against rot? Does it prevent algae and mold? Will it stop wood cracking?
- What finish will it give? If you want the natural wood grain to show through this is particularly important. Preservatives can be clear or add a stain.
- Is it for use on unpreserved wood or can it be used for retreating wood?
- Can you apply paint or varnish over the top?
- How many years’ protection does it guarantee? For woodwork in hard to reach or exposed places, you want it to last between 20 and 30 years.
Wood Preserver for DIY Projects
The best wood preserver for DIY projects in the garden is a solvent-based preservative or a water-based preservative. They are available in DIY stores and garden centers. They may not technically be classed as a preservative but as a wood treatment. They often contain a mix of biocides, pigments and water-repellent ingredients such as wax.
The advantage of using a wood treatment over a commercial or industrial preservative is fewer harmful chemicals that can damage health and the environment.
The disadvantage of wood treatments over stronger preservatives is they may need reapplying every 2 to 10 years. Treatments with wax repellents can’t be painted over.

How to Preserve Exterior Wood
Treating wood with preserver is simple enough for anyone to do. However, there are different application methods and drying times. For this it is important to read the instructions on the container before you start.
Step 1: Plan ahead
Plan ahead and choose a week when the weather is forecast to be warm (not hot or humid) so your treatment will dry.
Make sure you have enough preserver to cover the surface area of the wood two or three times over. You can use a coverage calculator to work out the area and how many liters you need. However, if you are treating areas such as sheds, make sure you work out the length x width x height for the total area.
If you are treating wood that isn’t flat, such as decking boards that have a grooved surface, you will need to add at least 50% to your surface area total. Remember that softwood is likely to absorb more liquid than hardwood, so factor this into your calculations.
Also check how to clean up spills and brushes before you start. Buy the right cleaning solution in advance.
Step 2: Prepare your wood
How much preparation is needed will depend on the type and condition of your wood. Clean off any loose debris and dirt with a stiff brush. Your wood should be free from paint and varnish. If there is any on your wood’s surface, scrape or sand it off.
Step 3: Apply your first coat
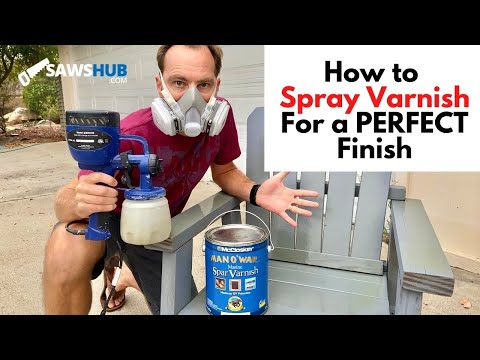
You can use a brush, roller, or sprayer to apply the preserver. A large synthetic brush is the best option.
A sprayer can be used to speed up the process on large amounts of wood. However, you need to use a targeted pump-action sprayer with a coarse rather than misting nozzle. Wear protective clothing and shield the area around where you are spraying. Also, keep pets and children away from the area.
Apply liberally so that the preservative soaks into the wood. Exposed end grains of wood are particularly vulnerable, so make sure these are fully coated. Wood that is coarse or weathered may be more absorbent and take more coating. Once the wood appears to be saturated or not absorbing the liquid anymore, you can stop.
Small pieces of wood can be dipped or immersed in the preservative. However, these will need submerging for at least 3 minutes.
Step 4: Wait between coats
Instructions vary between types and brands of preservative, so follow these carefully. Most products will state 24 hours as the drying time. However, lower temperatures and heavily saturated wood will lengthen the drying time, so only use it as a guide.
Step 5: Applying paints and varnishes
You may want to finish your woodwork with an exterior paint or varnish. For this to take to the treated wood it’s important to wait until the preservative is fully dry. Although it could be touch dry within 4 hours, you should wait for a further 72 hours at the very least before applying decorative finishes.
Conclusion
Now I can see that preserving wood is important. It prolongs the lifespan of my woodwork projects, so I get more use and enjoyment out of them. You now know how easy it is to apply, so you can complete those exterior woodwork projects properly.