As an Amazon Associate we earn from qualifying purchases.
If you’re considering a DIY bathroom or kitchen remodel, you’ll likely need to know how to cut tile, among other projects such as installation, and cutting galvanized pipe for plumbing. If you’ve never done this kind of work or even handled power tools before, you can still learn how to do this for your project in a safe and efficient way. By learning these basics and understanding some simple precautions, your DIY project is on its way.
Below, I will first discuss the different types of tile that are commonly used. It is important you understand the differences, because each type takes a different process for cutting.
After that, I will go through how to cut each variety of tile. I’ll finish by walking you through how to operate your tile saw, and specific cuts that your tile project might require.

Types of Tile
When I talk about tile, I am referring to a manufactured piece of durable material that may be composed of ceramic, metal, stone, or sometimes even glass. Tile is a common material used for both roofs and floors. It can also be used to cover exterior and interior walls, such as a kitchen backsplash. In addition, it is used in showers and even objects such as tabletops.
There are several types of tile to choose from for your home improvement project. Three of the most commonly used are ceramic, porcelain, and stone.
Ceramic Tile
Ceramic tile, which can be seen in homes and buildings throughout the world, is simply clay that has been formed, glazed, and baked.
Ceramic tiles are porous, meaning that they absorb water and moisture, so it is recommended that you only use ceramic tile in areas that don’t get wet.
Avoid usage in high traffic areas as well, since ceramic is a softer tile and more prone to chip or break.
Porcelain Tile
Porcelain tile is a form of ceramic tile, although it is much harder than ordinary ceramic tiles. As a harder tile, it is common to use this in high traffic areas that get used heavily.
Because of this quality and the fact that it has a water absorption rate of less than 0.5 percent, it’s a popular choice for both wet and dry areas, such as bathrooms and kitchens.
Porcelain tile is more durable and typically more expensive than it’s ceramic counterpart. And, porcelain usually has a lot more design choices.
Due to how hard it is, porcelain tile can chip when being cut. Take care as you work with it.
Stone Tile
Stone tile, on the other hand, is typically made from marble, onyx, granite, or slate. This is most commonly used in flooring, although it can be used in other locations throughout your home.
Stone tile has a very authentic look and feel to it, and is the most natural of the three tile options. Stone tile is very difficult to cut and is covered in it’s own section of this guide.
One specific stone tile that I’ll cover is marble. Marble tile is the cream of the crop. It is beautiful in appearance, and completely unique. No two pieces of marble are exactly alike. And, marble takes a few specific details to cut properly.
Many homeowners debate over the perks and pitfalls of installing stone tile inside their home. On one hand, stone is beautiful, unique, and completely natural. On the other, it is porous and difficult to maintain.

When it comes to how to cut tile, cutting stone tile is a lot more difficult than cutting ceramic or porcelain tile. If you spend a lot of money on your stone or marble tile, you might consider hiring a professional to cut the tile.
Nonetheless, I’ll still cover how to cut stone tile with a wet tile saw below.
Different Ways to Cut Tile
If you’re determining how to cut tile for your project, there are several different methods you can choose. These are based on the tile you’re using, the outcome you desire, and the tools you have available to you. As a note, when I refer to cutting ceramic tile in the guide, these methods apply to either ceramic or porcelain tile (as porcelain tile is a form of ceramic).
How to Cut Ceramic and Porcelain Tile by Hand
If you need to cut ceramic or porcelain tile for a relatively small project, you can do so manually by using a carbide-tipped pencil, straightedge, and tile nippers.
To cut in a straight line, simply line up the straightedge on the tile and score it using the carbide-tipped pencil. Grasp the tile with the nippers and apply pressure until the tile snaps along the line. If the remaining piece of tile has a rough edge, you can use a sharpening stone to smooth it out.
You can repeat these steps for all the tiles you need to cut. Keep in mind it will be a time-consuming process, and there are other options when it comes to cutting tile for larger projects.
I recommend utilizing a tile cutter or, even better, a wet tile saw. Not only will this make the job easier, but your cuts will be more precise, and your edges straighter. Next I’ll dive into how to cut tile with a tile cutter.
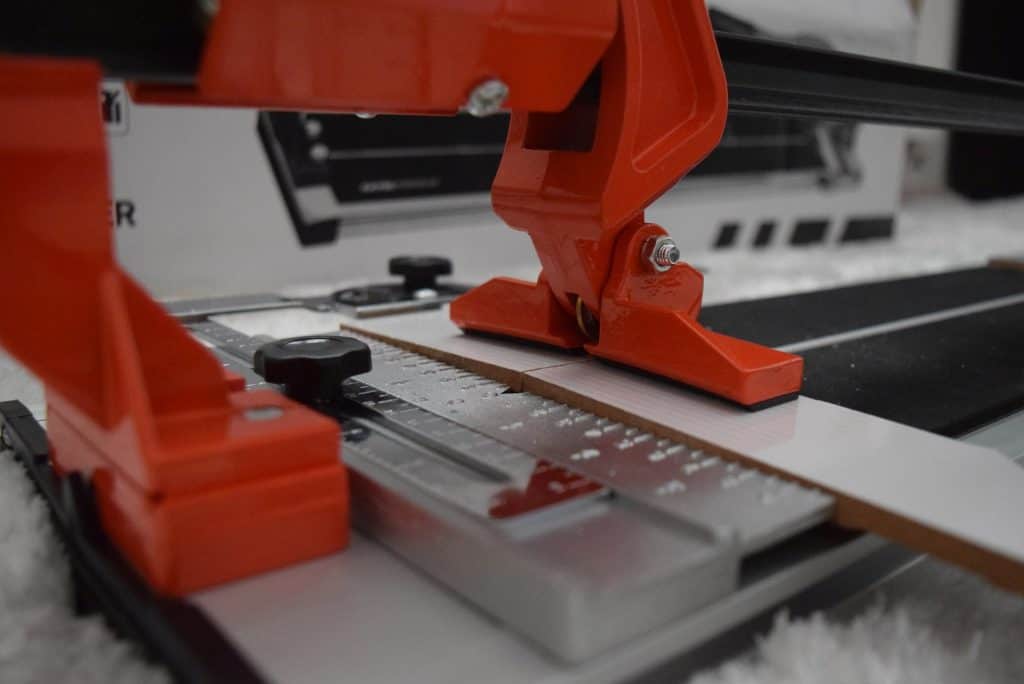
How to Cut Ceramic and Porcelain Tile with a Tile Cutter

Another option for cutting ceramic or porcelain tile for a relatively small project is a tile cutter. You can purchase or rent a tile cutter from a home improvement store. Keep in mind you’ll need one that’s wider than the tiles you’re cutting. Measure the tiles from corner to corner.
The cutter should also have a rotating guide that allows you to make cuts at different angles. Together, these attributes will give you the most flexibility when cutting ceramic tile.
If it’s your first time using the tile cutter, make sure to practice first on a few scrap pieces so you can get the hang of it.
When cutting a straight line, use a pencil and ruler to draw a line on both sides of the tile, which will guide your cut. If the tile is glazed, you may need to use a carbide-tipped pencil.
- Slide the lever of the tile cutter so the blade is closest to you, then place the tile in the cutter with the glazed side facing up. Position your pencil mark in line with the guide line, and make sure the tile is snug against the stop. Tightening the protractor gauge so that it’s against the side of the tile will help you to place additional tiles in the same spot. By doing this, they can be cut to the same exact size.
- Once the wheel is in line with your pencil mark, push down on the lever and apply even, continuous pressure to drag the lever across the tile and cut through its surface. This is called scoring the tile.
- The score line is now the weakest point of the tile. Pushing down on the lever to apply pressure on both sides of the line will allow you to snap the piece of tile in two.
- The edge of the tile may be a bit rough. If so, rub it with a sharpening stone to smooth it out.
You can cut tile pieces as large as 12″ with a tile cutter – anything larger will require a tile saw. A tile cutter can be used for small jobs, but it isn’t nearly as efficient as a tile saw. And, since the cuts aren’t as precise or accurate, you might go through a lot more tile to get the right shapes and sizes.
How to Cut Ceramic and Porcelain Tile Using a Wet Tile Saw
If you’re planning to cut a lot of tile for your project, you should consider buying or renting an electric wet saw for the job. Since this is a more advanced tool, make sure to read all provided instructions before you turn on the saw. And be sure to follow all safety precautions, including the use of safety goggles and gloves, to protect yourself.
As with the two previous methods, you’ll first want to measure and mark your tile where it needs to be cut. Following the manufacturer’s instructions for the wet saw, make sure there is enough water in the reservoir. Before you cut, turn the wet saw on and confirm that water is flowing over the blade.
Adjust the guide to the proper location, or mark the line you want to cut with a pencil on the glazed side of the tile. Place the tile face up and secure it snugly against the guide.
Turn on the saw and cut the tile the same way you would cut wood using a table saw. In other words, let the blade do the work. Don’t force the tile into the blade.
This method will give you a cleaner cut. But, if you do end up with a rough edge, you can smooth it out with a sharpening stone.
How to Make Curved and Corner Cuts with Tile Nippers

Whichever of the above methods you choose to make your straight tile cuts, you’ll probably want to use tile nippers to make curved and corner cuts in your tile pieces. You may need to make these cuts to accommodate the corners of the room or wall you’re tiling, or to make room for outlets to show through a tiled wall.
In this case, you’ll want to follow the same system of measuring and marking the tile in the exact places you wish to cut it.
However, you should not try to nip off the excess tile all at once, as you might end up cracking the material. Instead, use the nippers to break off small pieces of the tile.
Work your way toward the marks you drew, until you’ve nipped off the entire section. As you get closer to the lines you’ve marked, take smaller and smaller nips from the tile. This prevents you from accidentally taking off too much.
Using this method, the nipped end of your tile will almost certainly turn out rough. You will need a sharpening stone on hand to smooth it out before you place it.
How to Cut Stone Tile and Marble Tile with a Wet Tile Saw
As with ceramic tiles, you can use a tile nipper, tile cutter, or electric wet saw to cut stone tiles. However, there are two other methods you may choose for this material.
Using a wet tile saw helps to ensure that you don’t shatter the stone or marble tile.
If you don’t have a wet saw available, you can cut stone tile with a manual hacksaw. This tool should have tungsten carbide teeth instead of a steel blade.
Use a straightedge and a pencil to mark a cutting line on the stone, then score it using a sharp utility knife. Then use the hacksaw to cut through the scored line. Make sure to wear safety glasses and gloves during this process.
The second alternative method is to use a hammer and chisel. This method is recommended only if you desire more rugged, imperfect edges on your tile. Use a straightedge and a carbide-tipped pencil to score the tile along the line you wish to cut. Position the tip of the chisel over the center of the line you’ve scored, and then firmly tap the top of the chisel with a hammer.
This should sever the tile in two. Keep in mind that cutting tile in this way can be challenging and require a bit of skill. If you choose this method, you’ll want to practice on scrap tile beforehand.
Both these alternative methods may produce rough edges. If you wish to smooth them out for aesthetics, you may do so using sandpaper or a sanding stone.

How to Make Cuts with Your Wet Tile Saw
Wet Tile Saw Defined
A wet saw is a power tool that features a diamond blade, which is cooled down by water as it rotates. This water-cooled cutting technique helps to eliminate dust, which can be a major concern when cutting tile.
The saw typically features a sliding table. This feeds the tile you’re cutting into the blade. It should also have a water reservoir, where the water is held, and a pump that sprays the water over the blade while it is rotating.
Unlike most saws, the diamond blade does not have teeth. This makes it an ideal tool to use when you need to make more delicate cuts.
The saw typically features a sliding table. This feeds the tile you’re cutting into the blade. It should also have a water reservoir, where the water is held, and a pump that sprays the water over the blade while it is rotating.
Although there are other ways to cut tile, such as using hand tools like a glass cutter. This will work in a pinch, but it is not a good strategy for a larger project.
The wet tile saw is your best option for cutting a large amount of tile. It is also the best option for performing specialty cuts, such as round cuts or other shapes that allow outlets, drains, or other fixtures to show through your tiled floor or wall.
A wet saw may be used to cut ceramic, porcelain, or glass tile. As with any saw, though, safety precautions should be taken to ensure you don’t end up with an injury. When operating the saw, you should always remember to wear safety goggles and gloves.
Never operate the saw while wearing loose jewelry or clothing. Although the wet saw’s blade does not have teeth, it is still incredibly sharp. Therefore, you should always keep your fingers and other extremities well clear of the blade both when it’s running and when it is turned off.
Before You Start Cutting
If this is your first time using a wet saw, you may want to buy extra tile. You can practice using the saw on scrap pieces and get used to how it handles.
Operating a wet saw is not difficult, but it does require a steady hand and confidence in your ability.
Once you’ve practiced and have chosen the tile pattern and layout for your project, you’ll likely need to cut many pieces of tile to the same size. The wet saw makes this an easy process.
You can set the fence on the saw’s platform to an exact distance from the saw’s blade, which will result in tiles of the same exact size.

Basic Wet Saw Cuts
Whether you’re cutting ceramic tile with a wet saw or you need to slice through porcelain or glass tile, this power tool allows you to easily make a wide variety of cuts.
The most basic cut is the square cut. This cut you will use the most if you are cutting your tile into the typical squares or rectangles.
- Once the fence is set, put on your safety equipment, make sure the tile is clear of the blade, and turn on the saw. The water should begin flowing over the blade automatically.
- Holding the tile with both hands, feed it along the fence and into the blade. Make sure to push slowly, letting the saw do the majority of the work.
- Always keep your fingers away from the blade. Continue gently, but firmly, pushing the piece of tile until it completely clears the blade.
- When cutting glass tile with a wet saw, keep in mind it is a bit more fragile than ceramic tile and may chip or crack more easily. To help prevent this, position a piece of scrap tile underneath the glass tile for support.
You should also be extra careful to guide the tile into the saw blade slowly and smoothly.

Notch Cuts with a Wet Saw
When cutting porcelain, ceramic, or glass tile for your project, you may need to cut a notch in the corner of a piece of tile. This allows room for a fixture, such as a toilet or a light.
Cutting out a small square from the outer edge of a piece of tile is easy with a wet saw. It’s easiest when you make the cut in the corner of the tile.
- First, you’ll want to measure how deep you need the notch to be.
- Then, mark where you need to cut using a pencil that shows up on the tile.
- Next, make two straight cuts along your marks, resetting the fence after your first cut to make way for the second.
- Stop each cut when the blade reaches the line that marks the end of the notch. If the remaining edge is jagged, you can trim it using the wet saw.
- Place the tile back on the saw with the blade inside the notch. Carefully touch the blade to the jagged edge, slowly sliding it sideways with pressure on the tip of the blade to smooth it out.
An L cut is similar to a notch, but larger. This is often made to accommodate a cabinet or piece of molding. To make an L cut:
- Measure out and mark your tile the same way you would to make a notch.
- Then, use a combination of straight cuts and notches in order to cut out the full shape.
Notch cuts are much more challenging than basic square cuts, but typically you need to make a few of them during a typical tile cutting process.
Circular Cuts with a Wet Saw
Making a circular, or radius, cut with a wet saw is a bit trickier than a straight-edge cut. But, it’s still possible.
- First, establish the radius of the circle you need to cut.
- Then, draw the arc onto your tile with a pencil.
- Next, use your pencil to mark several straight lines from the outer edge of the tile to the radius line.

This effectively divides the circle into several rectangles. Use the wet saw to slice away the tile via these lines, only cutting as far as the radius line.
You’ll likely be left with a jagged edge around the radius line. To smooth that out, you can chip away the extra tile with tile nippers and then rub it with a rubbing stone.
Alternatively, if you have a steady hand, you can use the wet saw blade to carefully file down the edge.
There are other ways to cut glass tile and to cut a circle in tile that don’t involve a wet saw.

Conclusion
If you’re planning a home improvement project that requires you to cut tile, the idea may seem daunting if you’ve never done it before. However, there are many methods used to cut tile.
Whether you’re working with ceramic, porcelain, or stone materials, you can surely find one you’re comfortable with and makes the most sense for your project. Decide what type works best for your project, including the grout you’re using, whether its a kitchen backsplash or new floor for your outdoor patio.
Whether you decide to cut your tile manually with tile nippers or use an electric wet saw for the job, the most important thing to keep in mind is safety. To that end, make sure to follow all instructions included with the tools you’re using, and always wear safety glasses and gloves to protect yourself from injury.